|
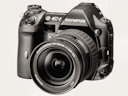
Customizing the Olympus E-30 Making the camera truly yours without mess and confusion |
|
|
My other articles related to the |
|
It is easy to get confused by the plethora of user preference settings and other options in the E-30. The camera can, indeed, be tweaked extensively to better fit the photographer's taste, preferences, and working habits, but complexity is a price which has to be paid for this. This is why you may need this article. If you are coming back to this article just to revise your E-30 setup, you may be better of using just my quick cheat sheet, suitable for printing as a quick reference. |
|
The settings and preferences available can be roughly divided into three groups; to make my job easier and to avoid repetitiveness in the text, I'm going to color-code them as follows:
|
| Except for the two first entries, this menu deals with the parameters of the imaging engine. Of these, only ISO and Noise Reduction affect raw images; the rest are just stored as values in those, so that they can (but do not have to) be used "as shot" in the raw-to-RGB conversion in postprocessing. | 
| 
|
|
The menu item images below have been converted to monochrome for better readability in printed copies. Not a setting: used to erase all images from the currently selected card or to format it. From this sub-menu you can define, reset, or recall a camera setup. This function will be discussed in a separate section. This sub-menu allows you to modify a number of Picture Modes, each being a set of image processing parameters. From here you can also select the mode for the camera to use. Both functions can be accessed more conveniently from the Control Panel. There are four color Picture Modes, one monochrome, and one — user-defined.
|
| Picture Mode | Parameter | Base | Adjust | Total |
| Vivid | Contrast | 0 | 0 | 0 |
| Sharpness | +1 | -2 | -1 | |
| Saturation | +1 | 0 | +1 | |
| Natural | Contrast | 0 | -1 | -1 |
| Sharpness | 0 | -1 | -1 | |
| Saturation | 0 | 0 | 0 | |
| Muted | Contrast | -1 | -1 | -2 |
| Sharpness | -1 | -1 | -2 | |
| Saturation | 0 | -1 | -1 | |
| Portrait | Contrast | 0 | -2 | -2 |
| Sharpness | -1 | -2 | -3 | |
| Saturation | 0 | -1 | -1 | |
| Monochrome | Contrast | 0 | -1 | -1 |
| Sharpness | 1 | -2 | -1 | |
| Filter | - | Red | ||
| Picture Tone (tint) | - | Neutral (none) | ||
|
The Custom mode inherits from its parent the base (offset) values, but not any adjustments. In my setup it is identical to Natural with Auto gradation enabled (see below), but this may still change. Larger sharpness adjustments I'm using in Vivid and Monochrome are intended to bring the absolute sharpening to the same level as in Natural. I found that higher settings can produce visible artifacts. Treat my preferences largely as a matter of taste, possibly a starting point to your own custom setup. Still, it is unlikely that you will need to adjust any parameters up. After the Picture Modes have been defined, you have a choice of the one to be set as default after a custom reset. I chose Natural. The choice is between Normal, Auto, Low Key, and High Key. Low Key and High Key move the central part of the tonal curve down or up, respectively, therefore making the mid-tones darker or lighter (with smaller impact on tonality near the ends of scale). This is not the same as just decreasing or increasing the exposure. This can be equally well done in postprocessing, even if you store your images as JPEGs. For this reason I do not use these options. The Auto uses what Olympus refers to as Shadow Adjustment Technology; it extracts more detail from shadows by lifting the part of the tonal curve to the left of mid-tones. This may be useful when photographing bright scenes with large areas in shadows, which otherwise could become unreadable.
You can choose between the Olympus raw format (ORF) and one of the four JPEG size/compression combinations (which are, in turn, defined in the Settings 1G sub-menu). This means that if you would like to use a combination not "out of the box", you will have to define it there first, before you choose it here. Two presets I use most often are Large/Superfine and Large/Fine; unless you are using the raw format, the real choice will be just between them. Actually, I find the former sufficient for all I'm doing; just for the peace of mind you may set this to Large/Superfine (which uses 50% more storage space, but card memory gets cheaper every day). Changing this setting "on the run" is rather a bad idea, as it is easy to forget to set it back as needed. This menu item offers access to various WB presets (including Auto), but it also allows for introducing persistent corrections to these settings.
As a default for a reset slot I prefer Every preset available here (except for Custom WB, defined as color temperature) may have its own correction entered, and that correction will be used every time this setting is used. I never had a real need to do it, but after using the camera for a while you may want to apply these individual tweaks.
This adjustment is done separately in two dimensions: amber-blue and green-magenta. It will override, for that preset, any If you really like tweaking the color balance, you will be probably saving raw images anyway, and in such a case all this becomes irrelevant.
The E-30 also allows you to define one custom white balance (CWB) setting. I've put 2500°K in that slot, as this is useful when shooting under lower-wattage bulbs, for which the standard incandescent (3000°K) setting is too warm. The color temperature for this setting can be entered directly from this menu, or through the Control Panel (by pressing the The Reference WB setting can be activated from here, but the only way to define it is by using the [Fn] button, to which this functionality must be previously assigned. This sets the image sensor gain, or, roughly speaking, its responsiveness to light. I prefer to do it manually, with the default at ISO 100, moving to higher values only when needed. If you leave this at Auto, the camera will move the ISO up when it considers the required shutter speed too slow for safe handholding (the upper limit of this adjustment is defined elsewhere). Better depend on your own judgement, unless you are routinely using the Program AE mode. This option turns on the low-light, static noise reduction which is done by subtracting a "dark frame" from a taken picture (again, see my noise article). This can be set to On, Off, or Auto. In the last case NR will be activated only at longest exposure times (usually above one second, depending on the ISO setting). The Auto setting makes sense as a default. When you switch to the sequential drive mode, noise reduction will become temporarily disabled, to avoid the extra delay between frames. Anyway, this setting is relevant only if you are using those long exposures. This removes the random (non-static) noise from recorded images during the raw-to-RGB conversion. It always leads to some detail being lost, even if the result may look more pleasing than the original. The process should not be confused with Noise Reduction, described in the previous section. For more on the difference, refer to my Noise in Digital Cameras article. There are four values to choose from: Off, Low, Standard, and High. The first one does not disable the filtering entirely, just sets it to some base value. How these presets work also depends on the ISO setting: my results clearly show that at ISO 400 the filtering becomes more aggressive, even if NF is set to Off. As the noise level is greatly affected by ISO and by the sharpening applied, the filtering should be set depending on these parameters. (See my article discussing that for the E-3.) Then, adjusting the noise filter every time those are changed is cumbersome and error-prone, so some compromises should be made here for sake of simplicity. This is why on the E-30 I've set NF to Low, which seems to work best for my adjusted Natural mode and never change it for anything else. The default Standard setting is too fuzzy for my taste. My advice: start from that combination, adjust it to your liking, make that your reset default, and forget about it. |
|
This menu groups the actual picture-taking options, therefore the choices made here will affect images stored as ORF (raw) and JPEG files.
Even if some of these settings may be probably adjusted on the session basis (sometimes even frame-by-frame), this will probably not happen often. | 
| 
|
|
This will be probably used only for choosing between
The choice is available via a direct button anyway, but even that one will not be much (if at all) used in my recommended setup: set the metering pattern default to either ESP or center-weighted (depending on which one you prefer to use), and assign the If you decide (like most users) to stick to ESP, you may make the process to assign more weight to the area near to the currently used AF sensor; the choice is done by selecting ESP+AF from a submenu here.
Neither the Unless you are using a remote setup of multiple (compatible) flash units, keep this setting at Off and forget about it. If you are using such a setup, you may activate this just before the multiple-flash shooting session.
The choice here is between Single AF, Continuous AF, and Manual Focus (two more modes, S-AF+MF and C-AF+MF, use AF in conjunction with MF). Usually the selection will not be done from the menu, as the two other ways to do it (Control Panel, direct button) are more convenient. Single AF makes a good default, as it works best in most cases, except for rapidly moving subjects; then the actual choice can be bade as needed via a direct button. This menu entry offers a choice between the full 11-point array, a five-point cross pattern (referred to as Dynamic Point), and a single spot. Suit your preferences here; I've settled down on the cross as a reset default, but some will prefer one of the other settings. The spot and cross patterns can have an AF point location assigned from here. This should be left at the center as a default. The single-spot mode may use one of two available sizes of the sensitive area; this is defined in one of the Settings sub-menus.
To avoid camera shake caused by the mirror travel, some cameras allow for an extra delay to be introduced between that and the actual exposure (i.e., opening the shutter). This is referred to as mirror lock (Olympus uses the term Anti-Shock). The feature can be useful in critical applications, when a tripod is being used. The length of this delay can be set in the E-30 from 0 (no delay) to 30 seconds.
Once the mirror lock delay us set to a non-zero value, the sequence of drive modes (accessible by pressing the dedicated Some of these "mirror-locked" modes do not make sense at all: for example, any of the sequential ones. These should be simply ignored until Olympus sorts out the mess and removes them. If you are planning to use the mirror lock often, a delay value of 2 or 4 seconds is long enough for such vibrations to die out; if not — set it to zero to avoid scrolling through a sequence of 14 drive modes, and change that setting only when needed. Out of four kinds of bracketing provided by the E-30 this is the most useful; in critical applications you will possibly use it a lot. Set the default to Off, activating as needed. Off by default, and pretty useless in shooting, too, In some situations this can be used instead of exposure bracketing to change flash-to-ambient light ratio. Set this to Off, to be activated only as needed. This is autoexposure bracketing by means of changing the ISO only. Again, Off by default. This enables superposition of multiple exposures in one image — something you set for a single shooting session, or even a single picture. In the default setup it should be, obviously, Off. Note: Not stored in My Mode. Here we come to actually customizing the camera, making its work your way. There are more than sixty options to set here (plus some housekeeping operations), so the list may seem overwhelming at last. Luckily, most of these settings are in the Red group: set once and forget. |
|
This menu contains more options than all others combined, so for easier navigation it branches into nine submenus: Technically, these are not submenus, as after reaching the end of one, further scrolling moves you to the next submenu; this works more like bookmarks in a flat list. | 
| 
|
| Here you set almost all of your preferences related to focusing, except for focus lock, which is in Settings 1B. | 
| 
|
|
From here you can enable or disable the autofocus aid light, used when the available light is not bright enough for reliable autofocus. This light is provided by the built-in flash (when raised) as a series of weak discharges, or by an external unit (when turned on) as with a dedicated LED (?) illuminator, much less intrusive. In either case, the setting allows to turn the AF aid off. It is irrelevant if the flash is not raised or if the external flash is turned off. I prefer to have this feature enabled. It may have to be turned off for use with slave flash units, to avoid premature triggering. This allows you to choose in which direction you will have to turn the manual focusing on Olympus Four Thirds lenses in order to change the focus towards infinity, so that you can stick to your habits acquired with manual lenses. The choice does not affect lenses with mechanical focus coupling, like the 12-60 mm ZD; one more reason to leave this alone. This is a protection against the camera refocusing in the C-AF mode every time something crosses the field of view (like people passing between the camera and the subject). It simply disables the focus adjustment if the change would be large and sudden. For most users the On setting makes sense here. You can disable the red blink in the viewfinder, showing the AF point used in a successful focus estimate. Most of us will want to keep this On. This changes the effective area of the AF sensor used in the single-point mode: Normal or Small, the latter denoted by [.]s in displayed indicators. I don't see much difference between both settings, so I'm keeping the Normal default. This option is used to choose how turning the control dial (while the AF point selection button, [...], is pressed) moves from one such point to another. There are three possibilities:
|
|
Here is where most of the camera's controls are customized.
Changing these preferences too often may lead to confusion and erratic camera behavior, so setting them once and leaving alone after some initial experimentation would be my sincere recommendation. | 
| 
|
|
If you are using two or more different Olympus cameras, you may try to make them respond to controls in a similar way — at least as much as it is possible. The two control dials in the E-30 are used not only in conjunction with direct buttons (about that, read here), but also alone, controlling the basic exposure parameters. How do they exactly function in the latter capacity is adjusted from here. Obviously, the adjustable parameters (and therefore dial functionality) depend on the exposure mode you are in. The available options include (if only applicable) exposure compensation, flash compensation, program shift, shutter speed, and aperture . |
| Exposure mode | Factory defaults | My recommendation | ||
|---|---|---|---|---|
| Rear | Front | Rear | Front | |
| Program (Auto) | Program shift | Exposure compensation | Exposure compensation | |
| Aperture Priority | Aperture | Aperture | ||
| Shutter Priority | Shutter speed | Shutter speed | ||
| Manual | Shutter speed | Aperture | Aperture | Shutter speed |
|
My assignment was intended to provide exposure compensation without using the My reversal of factory settings in Manual mode is due to the fact that I'm using the aperture priority AE most of the time; this makes operation in both modes more consistent. There is one more setting here, defining how the wheels work in menu navigation. I left it at the factory setting: the front dial duplicates the Up/Down arrow functionality, and the rear one — that of Left/Right. Out of the box, the E-30 dials increase the shutter speed or F-number when turned to the right. This default (shown as DIAL1 in the setup screen) can be inverted (DIAL2), which affects both dials and both parameters at once. The inverted direction will make sense for many: it will make the exposure parameter adjustment consistent with exposure compensation; the right direction means increasing exposure (at least in the manual mode). The default cannot be, however, changed in other E-System models, so I decided against doing it, to keep things the same in all cameras. This is actually a sub-menu used to define how the camera's AE and AF functions behave when the [AEL/AFL] (or Lock) button, right of the finder eyepiece, and/or the shutter release are pressed. This choice is made independently for each focusing mode: single, continuous, and manual. In each case you choose one of the pre-packaged combinations. Switching between SAF, CAF, and MF is not done from here; you can do it either from the Control Panel or with use of a direct button. The factory-default presets here make good sense. Still, if you know what you want, they may be worth changing to your taste. (Another option is to follow my advice, skip the details and jump straight to my recommendations, which are not much different.) Here is the complete listing of available options, completely re-worked since similar ones I wrote for other E-System cameras (it should be easier to navigate around). In the table below, [Lock] means pressing the [AEL/AFL] button, and [Release] — pressing the shutter release half-way down (be it intentionally or on the way to a full press). "Not locked" means that the function (AE, AF) continues to update the readings until the exposure, i.e., until the mirror goes up. Factory defaults are shown in bold. |
| Focusing | Mode | Autoexposure | Autofocus |
|---|---|---|---|
| Single AF | S:1 | Locked with [Lock], otherwise with [Release] | Locked with [Release] |
| S:2 | Locked with [Lock], otherwise not locked | ||
| S:3 | Locked with [Release] | Established with [Lock] and then not active | |
| Continuous AF | C:1 | Locked with [Lock], otherwise with [Release] | Tracked while [Release] is half-down; not locked |
| C:2 | Locked with [Lock], otherwise not locked | ||
| C:3 | Locked with [Release] | Tracked while [Lock] is down, then not active | |
| C:4 | Never locked (updated until exposure) | ||
| Manual Focus | M:1 | Locked with [Lock], otherwise with [Release] | Not active |
| M:2 | Locked with [Lock], otherwise not locked | ||
| M:3 | Locked with [Release] | Established with [Lock] and then not active |
|
Note that options S:3, C:3, and M:3 are almost identical: the camera stays in manual focus mode, with AF "on demand", activated when [Lock] is pressed. (C:4 is an additional flavor of this, with AE updating till the end.) The only differences are that in C:3 (and C:4) the focus is tracked while [Lock] is held down, and that the focus ring on the lens will be operational only if one of the "+M" modes (or MF) is active, or if the given lens has an all-time, mechanical focus coupling (like the 12-60 mm ZD). Another pattern is that the autoexposure is handled identically in S:1, C:1, and M:1; this is also the case between S:2, C:2, and M:2, as well as between S:3, C:3, and M:3. A closer look shows that the arrangement is not arbitrary, and all these options can be useful for some users in some situations. It makes sense to choose, for each focusing mode, the option best fitting your needs and working habits, and then forget about it. Changing the lock arrangement on the fly seems like a bad idea, as it would inevitably lead to confusion and unintended camera responses.
Recommendation:
The factory defaults, When this is activated, the Lock button will act as a toggle: the first press will turn the AE lock on, the second — off. The reading will stay locked also after the picture has been taken. (This has no effect when the Lock button is used for focusing purposes.) The feature is useful when the exposure has to be identical for a number of frames (like in panorama sequences), but it is too easy to forget that the lock is active, and keep shooting with the locked exposure forever (or until the camera is powered down). There is no indication in the external displays that the lock is on, which makes such snafus harder to avoid. This is why I would strongly recommend keeping the Lock Memo at Off, and using the metered manual exposure mode when a series of pictures has to be exposed identically. The Function, or [Fn] button can be assigned to just one of a number of available functions. The available options are:
|
| This group includes only three functions; I'm surprised to see the mirror lock placed in a different group. | 
|
|
Here "release priority" means that the camera will fire the shutter regardless of whether it is ready (autofocus done, flash charged, if applicable) or not. From here you decide if release priority will be used in the S-AF (single-focus) mode. In this mode keeping it at Off (default) seems to make more sense. Similar to the above, but for the C-AF (Continuous AF) mode. Because of the predictive autofocus and because in such situations it is better to risk an out-of-focus frame than no frame at all, the default On setting makes sense here. Here you define what "low speed", available as one of the drive mode options, actually means: from 1 to 4 frames per second. My preference is 3 FPS, being different enough from the high-speed rate of 5 FPS. |
| All these are options of rather minor significance, and they can be well left at factory settings. If you wish it this way, you may safely skip this section for now. | 
| 
|
|
You can enable or disable the beep the camera makes when autofocus is achieved. It is a matter of personal preference (unless shooting in a quiet zone), but I'm used to keeping it On This defines the period of inactivity after which the camera will enter the low-power sleep mode, disabling the LCD and all controls. When any control is used, the camera will almost instantly (with just the dust-off delay) spring back to life. This time-out can be set to Off (never), 1, 3, 5, or 10 minutes. I prefer 3 minutes; not that it matters much. The infrared remote receptor is disabled in the sleep state; if and when using the RM-1 or RM-2 for tripod work, you may want to disable the sleep feature. Similar to the above, this defines how soon will the monitor backlighting go off to save battery. The choice is between 8, 30, and 60 seconds plus Hold. While getting more familiar with previous Olympus cameras, I moved from 60 down to 8 seconds. Even at the Hold setting the monitor will go off when the sleep time comes. After the camera goes to sleep, its internal clock still keeps ticking, and the camera will turn itself off for good after four hours. To be activated again, it has to be turned off and on again. This feature can be disabled (set to Off) from here, but I prefer to keep the default On. This is the mode in which the USB interface is turned on when the camera detects the connection. Here are the options:
|
|
This group of settings changes how the exposure is metered and adjusted. Clearly, once they are set, you will never have to revisit this menu again (unless your preferences and/or needs change).
Surprisingly, there are only six settings here. | 
|
|
This is the step used in exposure compensation, and in manual setting of shutter speed and aperture. It can be set to 1/3, 1/2, or 1 EV. While 1 EV would be OK for shutter or aperture (except in metered manual mode, where you set both, and then 1 EV would not provide enough exposure accuracy), exposure compensation requires more precision: 1/3 EV is just fine (unless you've migrated from a camera with 1/2 EV adjustments and want to stick to the acquired habits). This is the step with which the ISO (sensor gain) can be adjusted. It can be chosen as 1/3 EV (ISO 100, 120, 160, 200...) or 1 EV (ISO 100, 200, 400...). The 1/3 EV step has no real advantage, so 1 EV would be my choice. (Some people, though, like to adjust ISO finely, so they will be glad to have such an option, even at the expense of tripling the length of the scrolling sequence.) This is actually not one setting but two related ones.
|
| Another short sub-menu; this one groups the preferences associated with flash use. This is relevant only to dedicated flash units (including the built-in one), which communicate with the camera via the proprietary Olympus interface. | 
|
|
This is the fastest shutter speed which the camera will use with flash. It cannot be raised above 1/250 s (which is the default limit), but you may lower it to any value down to Longer speeds increase the input of the ambient light to the final result, softening the harsh flash light a bit, but possibly causing WB problems in mixed-source light. I would recommend leaving this at 1/250 s. If longer shutter speeds are needed with flash, use shutter priority.
Here you can set the slowest shutter speed which will be used with flash in program and aperture priority AE modes (i.e., in cases when the camera sets the shutter speed). This limit can be set anywhere between 1/30 s and 1/250 s. It will be ignored if you use the flash in one of the Slow flash modes, as camera meters ambient light then.
If you would like to have flash as the sole source of light indoors, set this to 1/250 s, equal to my recommended high limit. For softening the flash with ambient light, set this low; the camera will usually stay close to that limit, so this will effectively become your indoors flash shooting speed. I'm using
You can choose how the dialed flash exposure compensation is applied:
|
|
The preferences in this group control some aspects of the raw-to-RGB conversion, directly affecting generated JPEG files, but not raw ones.
Still, the values set are being remembered in raw files, and can be used in postprocessing by invoking the "as shot" option. | 
| 
|
|
This applies a color correction shared by (almost) all WB settings, including Auto and This will override any corrections previously defined for the individual WB settings (if you need those, define them after this one). The adjustment is done in steps of undocumented size. Unless you think the E-30 colors need to be shifted overall in a given direction, leave this setting alone. A choice between sRGB (used by practically all computer displays and printers) and Adobe RGB, said to provide a wider color gamut. If you are not 100% sure what Adobe RGB really is and how you can benefit from it, just forget about it and use the default sRGB.
Every lens, especially wide-angle, has light fall-off (vignetting) towards the corners. The camera can compensate for that, brightening the corners during raw-to-RGB conversion. This process uses lens information passed from it to the camera, so that the effect is applied as needed. This function can be turned on or off. I see no reason not to have this set to On. Here you define the four JPEG resolution/compression presets which then will be available for a quick recall from the menu (or from Control Panel). Each of these presets gives you the choice of two factors:
|
| These are preferences regarding card file system access. Some related ones can be also found in the Settings 2 menu. | 
|
|
Setting this to On allows you to delete the currently viewed image with a single press on the red trash can button, without any confirmation. This may be dangerous, therefore I would keep this at Off, but setting the Priority Set [sic!] to Yes; deleting a file would then require a confirmation with just one extra button press. If you save images in duplicate (ORF+JPEG), this option defines which is being erased When the Delete (trash can) button in viewing. the camera may delete just one or both versions, depending how this preference has been set. To avoid confusion, I've set this to both, i.e. RAW+JPEG. This defines how the numbers in file names (see Edit File Name), are assigned when an empty card is mounted. There are two choices:
|
| This menu is a grab bag of random options, plus some housekeeping operations. The best thing about it is that you will be very rarely, if ever, accessing it. | 
| 
|
|
This operation (not a setting!) puts the camera in the cleaning mode: the mirror goes up and the shutter opens, so that the dust barrier in front of the image sensor becomes accessible for cleaning after the lens is removed. If the battery gets low during that time, the shutter will close, with the mirror returning down; one or both may suffer a damage. The E-30 has an external light receptacle, placed between the grip and lens mount, and used to help the Auto WB function. I would leave it On, which is the default.. Another maintenance function: adjusting the AF sensors, if you are feeling that your camera suffers from a focus shift. This is a separate subject, and I'm going to leave it alone until I feel a need to use it. Exposure compensation can be easily dialed in for every individual image, if and as needed. The E-30 allows to add an extra amount of it, which will be applied to all frames and not shown in the compensation value displayed. This should be really understood as a calibration of the camera's AE system. For most users the camera is calibrated just fine right from the factory, so that the exposure shift does not need to be applied. Some, however, may like their images generally a bit darker or lighter than the factory calibration provides. Those may want to add a slight shift here. The applied value can range from -1 EV to +1 EV in 1/6 EV increments, which makes sense, as this should be a fine tweak. It is defined independently for all metering patterns: matrix (ESP), center-weighted, and spot, and the values are stored in custom reset slots. This adjustment is not something I would recommend doing right after you've got a new camera. Use the factory zero setting to take pictures for a month or two, and only then decide, carefully. With the E-500 and E-510 I used an exposure compensation of -0.3 EV for subjects without areas which would need protection from highlight wash-out; this means the factory settings were a bit too high for my taste. The E-3 was toned down a bit: no compensation was usually OK for such subjects. The situation seems similar for the E-30. At the moment I'm still not sure, but I think that after my reports and sample images of this camera are done, in a few weeks, I will probably apply an exposure shift of just -1/6 EV, as the final step in tweaking the E-30 to my taste. This setting is relevant only for AA batteries used with the HLD-4 grip/holder. Three types (named with numerals 1, 2, and 3) are to select from, and the only information provided in the manual is that Type 1 (default) should be set for alkaline, lithium, and Oxyride (a new chemistry, used by Panasonic) batteries. There is no reference to the rechargeable NiMH type. You can adjust the level at which the camera displays the low-battery warning. If you think your E-30 shows it too early or too late, you may fix it here. I left this at the default setting. Another tweak, allowing the user to memorize the current camera orientation (on a tripod, of course) as the reference, from which any deviations in two dimensions will be measured. Use this only if your E-30 is not calibrated properly out of the box. You can also cancel all adjustment and return the camera to the factory state. |
| Another grab bag of seemingly unrelated settings, which should rather be distributed among the Settings 1A..1I sub-menus. | 
| 
|
|
This is rather a housekeeping function. If the clock is set properly, your image files will be correctly time-tagged. The clock does not automatically switch to the daylight savings time, neither does it switch between time zones. This is understandable; any such adjustments have to be entered by hand, but I would advise against it. For consistent time stamps, set the clock once to your home time zone without DST, and leave it there, adjusting once a year if needed. There is a 99% chance you will be using a Compact Flash card (faster, larger capacity, less expensive), keeping an xD-Picture for emergencies only. The choice, however, is not stored in Custom Reset slots. This allows the user to change the first one or two characters in the Olympus file naming convention. By default, the first character is fixed as 'P' (except when the Adobe RGB setting is in effect, when it becomes an underscore, '_'); and the second denotes the month (1..9,A..C, with 'A' standing for October, etc.). This is followed by a two-digit day of the month, and a four-digit frame number — all fits into the old DOS 8.3 naming scheme, for example, PA210099.JPG.
Either of the first two characters (Adobe RGB: only the second one) can be changed to a fixed letter or digit. There is no real reason to do it, except for assigning the first letter differently for each of Olympus cameras you may own, so that a quick look at the card directory will tell you from which camera the images come. The second character is best left at the default (month) setting, shown in the adjustment process as
The monitor brightness can be adjusted, and so can be its hue (color temperature). I'm OK with the default settings here, but you may want to adjust them to your liking.
The camera comes with 34 (!) languages to choose from. Choose one and stick with it, although you may be better off with English while reading this article.
This is the signal standard used when the camera's monitor output is sent to a TV set. You may choose between NTSC and PAL, depending on your country.
Here you define for how long the just-taken photograph is displayed on the LCD monitor (if it is active). This time can be set to any value between 0 and 20 seconds, with 0 disabling the review.
There is also an Auto setting, — in which the camera will switch into the full image review mode with all image review options accessible (including file delete). At first I thought I might like it, but this was not the case.
3 to 7 seconds seems to be a reasonable choice here (I'm using three seconds).
To be used occasionally to map out the few bad pixels which may show on your sensor. In addition to doing it every three or six months, it may be a good idea to take a test picture (with the lens cap on) before any major shooting session, to avoid cloning out the buggers in postprocessing.
Displays the installed firmware version for the camera body, lens, and external flash (if mounted and on).
A more detailed information on firmware, including the minor version digits, can be looked up in the EXIF data. For example, my E-30 shows Version 1.0 in the camera, and 1.004 in EXIF (you have to look in the MakerNotes section for that).
Storing and Recalling Setups
The camera setup, including almost all parameters discussed here, can be saved in one of two available Custom Reset slots or in one of two My Mode ones.
While both ways are similar, there are some differences in how they are used and how they work; these will be discussed later. In either case, restoring (or switching to) a setup by one of these methods is faster and easier than setting everything by hand again.
Quite a few of the preferences or settings are not stored in Custom Reset or My Mode slots, some for good reasons and some not. The (CF) or (CF/MM) tags in the headers of individual descriptions above indicate if they are.
There are two Custom Reset slots, defined in (and accessible from) Custom Reset in the
RESET
RESET 1 > NO DATA
RESET 2 > NO DATA
Instead of NO DATA, lines two and/or three may show SET; this means that a slot has its custom reset defined already.
The stored custom setup can be activated at any moment from the same menu (a more direct way is also available, see below):
Pressing [OK] when the (top) RESET option is highlighted will reset the camera to factory defaults. This does not clear the contents of your Custom Reset (or My Mode) slots.
A quicker way to perform a custom reset is by holding the ISO and
This feature is not as useful as it could have been, because it can be accessed only if the [Fn] button has ben assigned to it previously. If you have assigned that button to anything else, this description becomes irrelevant and you may just skip it.
Pressing the [Fn] button when it is assigned to My Mode activates one of the two available My Mode slots. These are used to store the preferences in a way similar to Custom Reset.
Out of two such slots, one is selected to work with the [Fn] button; the manual refers to it as
Storing a camera setup as a My Mode is similar to defining a Custom Reset:
MY MODE 1 | NO DATA
MY MODE 2 | NO DATA
Here NO DATA means that the mode has no camera settings assigned. Instead of that, you may also see SET (which means the mode stores such settings already) or CURRENT (that it is preselected, or "executed", for use with the [Fn] button).
Pressing the [OK] button instead of the right arrow in point [3] will preselect ("execute") the highlighted My Mode for use with the [Fn] button, if and when that button is set so.
The confusion which may arise here is due to the fact that the word SET is used in this menu in three meanings: (i) to assign the current camera settings to the highlighted mode, (ii) to denote that this mode has settings assigned, and (iii) to preselect it for use with the [Fn] button. Therefore it may be better to follow the above instructions literally than to rely on what the screens say.
Note that My Mode also stores the current exposure mode (P/A/S/M), unlike a custom reset slot. This will be temporarily active while you keep the [Fn] button down, if so assigned.
As I've already said, all this does not rally matter unless you decide to sacrifice the Function button to My Mode, and this seems rather unlikely.
I just hope the time you've spent reading this lengthy piece will pay itself off by providing you with a camera beter suiting your needs, habits, and convenience.
One final piece of advice: do not change these preferences too often: this will leave you no time to get used to the way in which your customized camera operates.
|
|
|
My other articles related to the |
|
Olympus® is a registered trademark of Olympus Corporation.
This page is not sponsored or endorsed by Olympus (or anyone else) and presents solely the views of the author. |
| Home: wrotniak.net | Search this site | Change font size |
| Posted 2009/02/10; last updated 2009/02/22; touched up 2013/11/04 | Copyright © 2009 by J. Andrzej Wrotniak |
 Card Setup
 Custom Reset


 Settings 1A: Focusing


 Continuous AF Lock
 AF Point Indicator
 AF Sensitive Area

 Lens Focus Reset
 Bulb Focusing

 Settings 1B: Buttons and Dials


 My Mode Setup
 Button Timer
 Lock/Function
 Settings 1C: Release and Drive


 Settings 1D: Display


 Four-Hour Timer
 USB Mode


 Settings 1E: Exposure, ISO


 Settings 1F: Flash customization


 Settings 1G: Image, Color and WB


 Settings 1H: Record and Erase


 File Name
 Priority Set
 DPI Setting
 Settings 1I: Utility
 Cleaning Mode


 Battery Warning Level
 Level Gauge Adjustment
 Clock
Clock
 Card Selection

 Monitor Adjustment
 Language
 Video Standard

 Pixel Mapping
 Firmware Version