|
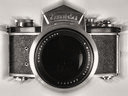
Re-skinning Your Exakta |
|
Signs of aging Many Exaktas, even those in generally good mechanical shape, show cosmetic signs of aging: the camera back exhibits bumps protruding through the leatherette. If you can lift and partially remove the covering, you can see a green oxidization compound forming deposits underneath (mostly around four rivets used to secure the film pressure plate in all models before VX 1000), and penetrating through the back wall to the outer surface. In extreme cases the deposit may cover larger stretches of the back, so that the leatherette covering is no longer securely attached to it and comes off easily. The reason for this effect is the chemical interaction between the material of the back (most probably brass or a similar copper alloy), humidity in the air, and some compounds in the leatherette and/or the shellac glue used by Ihagee. The camera back is chromed, but that layer is broken where the rivets penetrate the surface, and that's why the process starts there. Sometimes the mounds of the green goo are so big that it is hard to believe how all this could come out just from the four tiny screw holes in thin metal. A frequent scenario is that the aging owner of an Exakta stops using it, or passes away, and the camera sits for a decade or more in a basement or garage, gathering dust, mold, and humidity, before ending up on a flea market or an auction. Some people do not realize that a precision instrument should be stored properly. (Usually these are the same people who spell Thagee instead of Ihagee in their eBay postings, clean camera mirrors with their bare fingers, and get electrocuted while using hair dryers in a bathtub, therefore bringing the average IQ of the human race to a tolerable level.) Regardless of exact reasons, the bumps are definitely not a pretty sight and you do not want your camera to stay that way. What to do? If the bumps, even visible, are not too prominent, and the covering is otherwise OK, you may choose to do nothing. Just keep your camera in a dry place — certainly not in the garage, attic, or basement. The chemical process will slow down or get arrested and the camera may retain a passable cosmetic shape for years to come. If, however, things got really ugly, you may consider fixing the cosmetics. Very often the leatherette itself is in a good shape. It can be lifted and removed from the camera back, cleaned, and re-glued. If not, you will have to replace it with a new one. The choice is yours. Removing the leatherette Ihagee used a kind of shellac glue to affix the covering. It does not provide a strong hold, so usually, especially when really dry, the back leatherette can be removed with just a little persuasion, possibly with a help of a knife or a razor inserted underneath. In the latter case be careful not to cut through it; scratching the metal in the back is a lesser evil. In a few cases I had to resort to using some isopropyl alcohol on a Q-tip to make some stubborn places let go. Sometimes the leatherette will be soft and gooey, sometimes quite brittle; you will have to write it off and install new one — more about it later. Your Exakta may have a covering which already has been replaced in the past. If you are really unlucky, someone might have used contact cement to affix it. This usually means than not only you won't be able to re-use the existing leatherette, but even removing it may be a problem. Use common sense and refer to one of general do-it-yourself books regarding how to dissolve the glue. Sometimes you will have to literally scrap the existing covering off, a tough job without hurting the chromed metal. Cleaning the green goo A toothpick or some other wooden or plastic stick should work to remove most of the green deposits. Using metal tools may hurt the chromium plating, you be the judge. Sometimes I resort to using a Dremel tool equipped with a nylon-bristle wheel brush; it works fine for me. Finally, a wash with a soft pad soaked in isopropyl alcohol should remove the remaining amount, also cleaning off the residue of shellac glue. When the back is dry again, cover all rivet holes and any nicks in the chrome plating with transparent model paint; my wife's nail polish works just fine here. Just try to keep the layer thin. The paint will protect the brass from interacting with the leatherette and elements again. Re-using the old covering If the original covering is intact, you may put it back on the camera. This is the preferred way, as it preserves the camera's authenticity. Before that, however, the covering should be cleaned from inside. Scraping off the green deposits with a hard brush should work. You may try to soak the leatherette in isopropyl alcohol to dissolve the glue, and later remove it with a cotton pad. Washing it again in a new dose will help to remove traces of the glue, but may be not really necessary. After slow drying of the covering, it can be put on again. Opinions on how to affix it are split. I found that the often-recommended Pliobond glue tends to dissolve the leatherette — having learned the lesson the hard way I would recommend against using Pliobond; some other glues may also be dangerous. Contact cements are messy, difficult to remove and may also interact with the covering material. A shellac glue (preferably alcohol-based) should work best, some people say, but I haven't used it, being too lazy. In some sources I found recommendations against double-sided adhesive tapes, but this may be some misunderstanding — this is my favorite, cleanest and safest way to re-affix the camera leatherette. The 3M (Scotch™) company makes a product called Industrial Specialty Adhesive. This is not a tape with adhesive on both sides, but rather one consisting of a smooth paper backing and a thin, rubbery layer of adhesive. After attaching it to the inner side of the leatherette, the paper backing can be easily peeled back, and you end up with just the leatherette covered with adhesive backing — perfect! If you change your mind, the adhesive layer can be easily rubbed off with your finger; so can be any overflows over edges or holes. If needed, the covering can be removed and re-attached again, yet the bond is strong enough for the leatherette to stay on in normal use. I found it at the Micro-Tools Web site, specifically recommended for leatherette applications. As of this writing, a 60-yard roll 1" wide sells for $35, which may seem expensive, but the roll I bought back in 2000 will last me at least for five more years. Replacing the covering If your old covering is no good, you will have to replace it. Again, Micro-Tools sells sheets of self-adhesive leatherette (which can be easily removed and re-applied) in three kinds. Of three kinds offered I found the #4040 to provide the best match for the Exaktas (it is advertised as a match for Leica cameras); having used it in the past I can recommend it. Another option is to get such a sheet from Camera Leather online store, where it available in three different textures and various colors. (I haven't tried the latter option, but their pre-cut camera coverings are of good quality.) In any case, you will have to cut the leatherette to the right shape. You will need a hobby knife, a metal ruler, and lots of time and patience. Preparing paper templates and trying them on before cutting the real thing is recommended. If you are replacing only the covering on the camera back, things are relatively easy: all cut lines are straight. If you would like also to re-skin the front and bottom, you will need more skills: the front parts need circular openings for flash terminals, and the bottom in most Exakta models has a funky shape, all curves. Good luck. Pre-cut leatherette kits This is why I was happy to discover yet another option: the pre-cut camera coverings from Camera Leather. If you go to their Web site, you will be amazed by the multitude of materials, colors, and textures to choose from, ranging from unobtrusive (and inexpensive), black Seal Grain leatherette to Black & White Cobra or Indian Red leathers (the latter being goat skin imported from the UK). All of these come pre-cut to fit your camera — if that camera happens to be one of many models supported by the company. After getting the first kit from Camera Leather for one of my VX Exaktas I grew confident enough to get another one; at the same time I contacted Mr. Morgan Sparks of Camera Leather to check which Exaktas do they support. Here is what I've learned so far.
There are also inserts available for both types of prisms (P.2 with two inserts and P.3 with three), but not for any of the metering prisms. Unfortunately, none of the Exa models are supported by Camera Leather as of this time. The pre-cut, self-adhesive coverings from Camera Leather come on peel-off paper backing and are really easy to apply, even I could do it. Their Web site offers a page with step-by-step instructions and some useful hints, worth checking out. And the variety of textures and colors, including real skin, is staggering; one day I may dress up one of my spare VX's in Embossed Alligator, just for the heck of it. (To put things straight: I'm not in any way related to Camera Leather; I just find them provide an useful service for camera users and collectors, and I like the personalized way in which they run the business.) In case of doubts Purists may say re-skinning your Exakta makes it less authentic. This is true, especially (but not only) if the original leatherette has some embossing (like the Ihagee logo on pre-war Kine models). If possible, I would limit myself to removing the back covering, doing the necessary cleaning, and re-attaching the original leatherette. This, however, is not always possible: some cameras may be missing individual pieces of the cover; in some it may be irreversibly damaged. Some of Exaktas I bought had the covering already changed by previous owners, not always in the neatest way. In such cases I wouldn't hesitate to replace it entirely. Your decision. Last but not least, don't blame me if anything goes wrong. I'm sharing with you whatever I know on the subject, and my knowledge may be incomplete and inaccurate. If you have any corrections or additions, I'll be pleased to hear them, and incorporate into future updates of this article. |
|
| Back to my main Exakta page |
| Home: wrotniak.net | Search this site | Change font size |
| Posted 2005/04/23 | Copyright © 2005 by J. Andrzej Wrotniak |