with articles on computer applications in photography
|
Focus Magic Deblurring by Deconvolution and what can it do for your pictures |
|
|
Back to the Photo Bytes section, with articles on computer applications in photography |
|
Focus Magic is a software product, developed and sold by Acclaim Software of New Zealand (their sole product). Its main purpose is to reduce the out-of-focus blur in photographic images. How does that differ from sharpening, to which we've got used in the last twenty years? I believe the different naming is used to stress the fact that Focus Magic uses a more modern method of restoring the image, called deconvolution (I'm almost ready to write a separate piece on that). This technique uses a model of how the blur (or other image flaw) is created, trying to find the "before" image best fitting, after adding the effect, the "after" one. The name suggests that defocusing is a major part of the model used. The model used in Focus Magic is very general; in particular, it knows nothing about the lens used, or aperture. While this impacts both the accuracy of solutions found and the speed of the process, I still have high expectations from this method, compared to "classic" ones. The Smart Deblur filter, introduced ten years or so ago into Photoshop is said to use deconvolution, too. I know nothing on its performance, as I don't use Adobe products. The distribution package includes two versions of the software: a stand-alone executable and a Photoshop plugin. The plugin works with a number of Mac and Windows applications other than Photoshop. I'm using it with Paint Shop Pro 20 without a glitch. The plugin offers just two functions: Fix Out-of-Focus Blur and Fix Motion Blur; the names are self-explanatory. The stand-alone version adds three more: Defocus (adding blur), Increase Resolution (upsampling), and Despeckle (removing dot structure from images of printed matter). I'm at a loss trying to explain why those extras are included only in the stand-alone version. Not that I'm missing them in the plugin — they are of marginal usability at best; it just looks bad. I also don't quite understand why the first main function is listed in the stand-alone executable under a different name: just Focus. Not a real problem, but unprofessional; indicates separate code maintenance. The distribution .exe installs both versions, at least under Windows. On my system it detected the Paint Shop Pro 20 I'm using and made sure that it would find the plugin. (Don't take that for granted: my PSP 20 will not run a plugin distributed with it.) The downloaded software can be freely used for ten images, after which you have to purchase a license to continue. That would cost you $65 in the U.S. From the user's angle, this looks like a lot — for a piece of software performing, basically, just a single operation on an image. You can get a complete, decent image editor at this price. Well, smell the coffee. This is a product aimed at a very small market: those who can appreciate its advantages (see below), who actually need it, and who know when and how to use it. And an hour of developer's time costs the same. For every thousand of Lightroom licenses sold. Acclaim would be extremely lucky to sell a single license for Focus Magic. Been there, done that. Note also that this is a single, lifetime license, including all future upgrades. and nor a subscription (a model I greatly dislike). New versions will cost you nothing — as long as Acclaim Software stays in business. What worries me a bit is the clause saying that every time I install the software on a new system, I need to ask for a new copy of the license key. Does that mean that if I'm running three Windows machines (laptop, desktop, and a mini), i need to request three such keys? Or that a new key invalidates the old one, which would make it a single-system license? These questions should be clearly addressed by the vendor, and they are not.
Total Commander, which I consider to be the most essential of all Windows utilities, also offers a lifetime license. I bought it back in 1993, and never had to pay another penny, after countless computer changes, and running it on all three machines I'm using. By the way, if you don't have it yet, get it NOW and thank me later!
Anyway, I consider the potential quality improvements brought to my pictures by Focus Magic worth more than $65, so I gladly spent this money, even before using up my ten free trial frames. You decide for yourself. Not much to write about; most of that is self-explanatory. Your host application (usually: the image editor) shows one new plugin with two functions, and the stand-alone version has a drop-down menu to select among five available ones. Then you click in the image shown to define the before/after sample area, and adjust the parameters. For out-of-focus deblurring (a.k.a. just sharpening, even if the term is not quite accurate), which will be probably your main use of the software, these are:
The parameters for motion blur reduction are similar, additionally including blur direction. After setting and tweaking the parameters, a button click will start the computation. (In the plugin this also will return you to the host application.) A major advantage of the plugin over the stand-alone version is that it works with masked images, therefore different areas of the image can be processed differently (if at all). For some pictures this may be a matter of life and death (see this example). For the files and parameters I've tried, focus deblurring takes just a few seconds on my 2018, ultralight mid-grade laptop (Ryzen 5 2500U, 8GB RAM). The largest image I was able to process, 126 megapixels, took about 30 seconds. Larger ones, starting from 146 MP, would not run, giving an out-of-memory message (plugin), or just crashing (stand-alone, and this calls for some tender, loving QA care). The help file warns about processing times of one hour and more, far beyond what I've seen. I believe I've reached the upper limit of image sizes handled by this software, so maybe the time drastically increases with the blur width parameter? Anyway, after the processing is done, you may exit the plugin back to the host application or, in the stand-alone version, save the result as a JPEG file. Don't worry, the JPEG uses the lowest compression possible, so the process is virtually loss less. If you decide to add Focus Magic to your postprocessing, the next question emerges: where? At which stage in your sequence of operations? A natural thing to try would be to put it at the end, or very close, where the "old" sharpening likely used to be. Indeed, this seems like a natural place to try out first. I usually apply sharpening when almost done with an image, followed by noise reduction with Neat Image (in which I allow a little more to be used, just enough to compensate for the filter blur). Only cropping, if any, may come after that. This may be the right way. Or not. This method tries to untangle a mess caused by replacing N points of light with N overlapping stochastic distributions. It works best if those are not affected by any additional processing until the untangling is done. This would call for using the Magic at (or near to) the beginning of the sequence. We've got ourselves two contradictory recommendations. Unless, of course, deblurring is the only operation in our processing (except cropping, object removal, or similar). At this moment, I use one way or the other.
Sometimes I even do both: small deblur up front, larger at the end, especially if the second one is being applied to a selected area. Please do not consider all this to be a recommendation. I'm still learning how to best use this software, and my understanding of it may change. To understand how Focus Magic works, I've used it for 20 or so images, along with some other sharpening tools (mostly, but not only, Unsharp Mask and High Pass Sharpen in Paint Shop Pro 20). Here I'm presenting a selected few. The presentation format is the same (or close) in all cases, so let me introduce it up front to avoid repetitiveness later. The large thumbnail at the top shows the whole frame entering the process. reduced in size. Usually this is the in-camera JPEG (possibly after some cropping); sometimes it may be a picture already postprocessed. (While this is not recommended, it may happen in real life.) Clicking on the thumbnail brings a screen-sized version of the same frame, and the caption includes a link to the full-sized image file. Next follows a row (or a few) of image samples, 400×400 pixels, useful for a quick side-by-side comparison. I most cases the first one comes from the original frame, shown above. Now comes the good part. Each of those small samples links to a larger one (full-screen or close), taken from the same image. This is done with a Swapper, so you can use the arrow keys to alternate between them quickly, which is the best way to spot differences between similar (but not identical) images. Introductions done, let us see the images. To be frank, this image does not really need sharpening; at most a tad of it, to strengthen the visual impact of the sharpest parts (stamens, or pollen-carrying anthers and filaments). For Focus Magic I've used the auto parameters feature, very handy. For the USM I had to do some experimenting.
| Both tools do a nice job in increasing the sharpness ad (some) detail, but the USM, even at those, quite moderate, settings, already introduces some artifacts — see the white halo around the leftmost filament in the second sample below, for example. Yes, some extra tweaking of USM parameters could have helped here, but it is not so trivial, as we also want to get some extra sharpness. The fine dust (pollen?) on the rightmost petal (see the Swapper samples) also seems to be exaggerated by the USM: it is made not just sharper, but also brighter. Importantly, both methods successfully avoid messing up the out-of-focus areas, which sometimes may be a problem. The noise, checked in the far background, does not seem to be amplified, either.
| 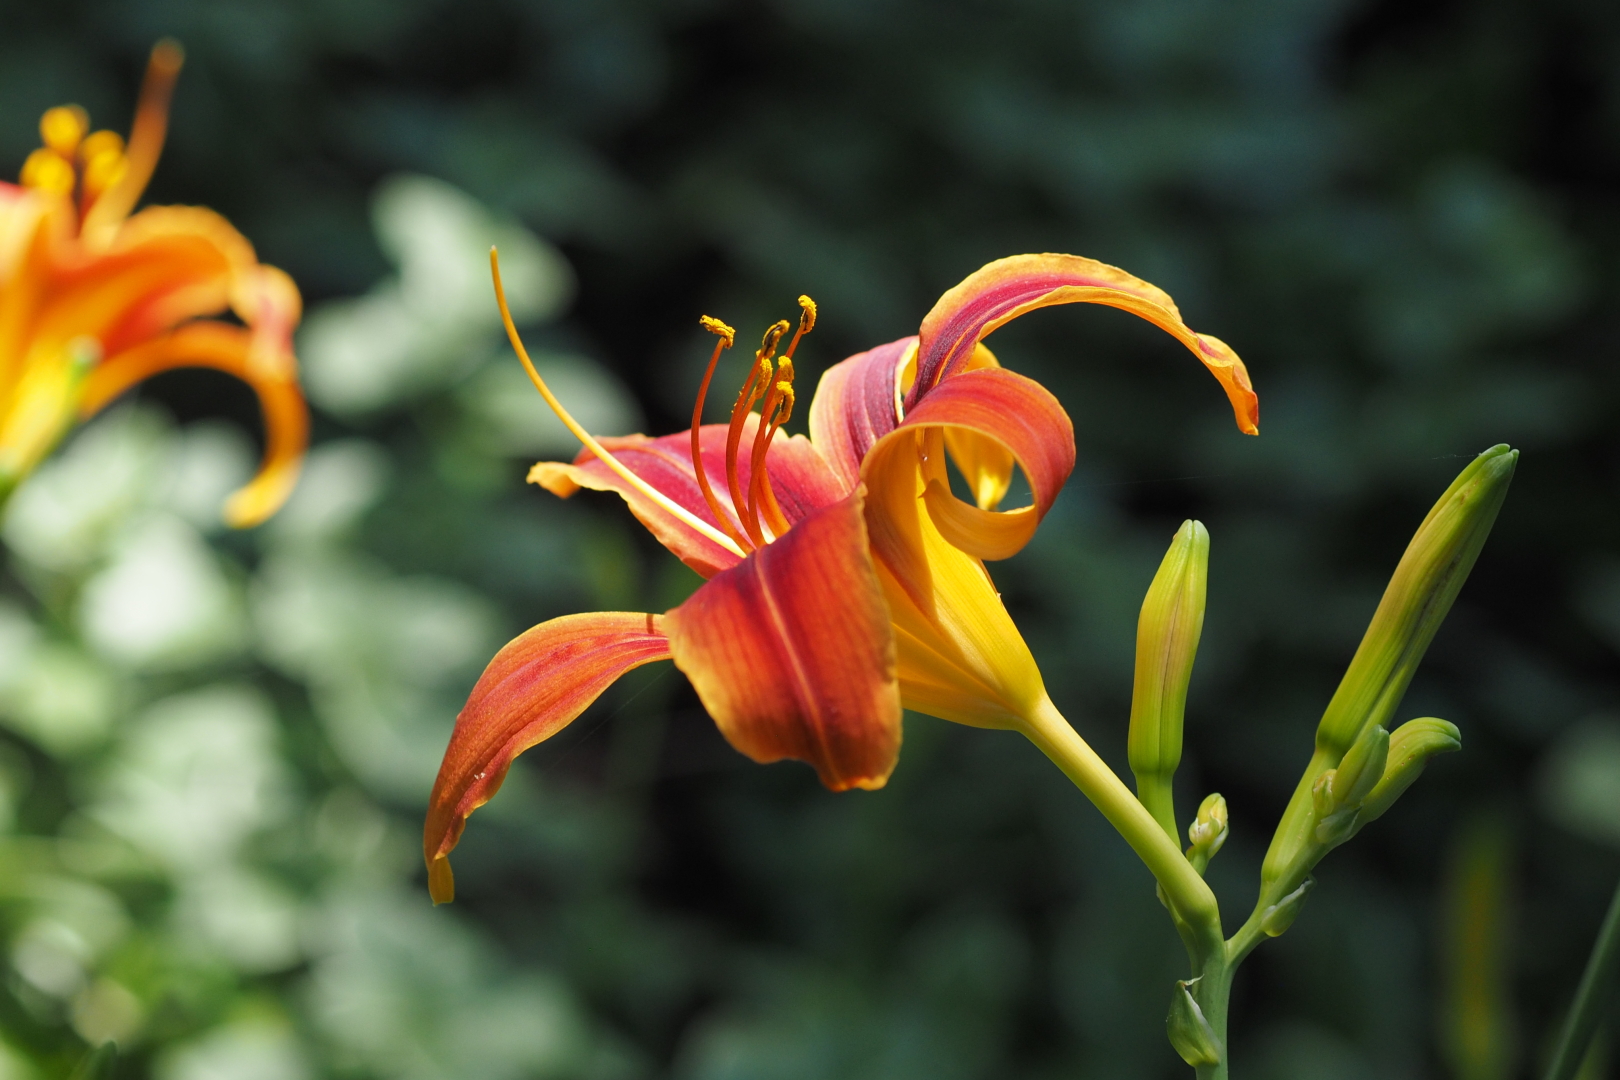
E-M1, MZD 75/1.8
| | ||

No explicit sharpening |

PSP Unsharp Mask |

Focus Magic |
|
Overall, the USM performs here well enough for typical applications. For critical ones, however, and for pixel-peeping, the Focus Magic seems to have a subtle, but clear enough, advantage. It is also easier to use, with auto parameter setting. Among long lenses (say, EFL of 300 mm and above), many (especially those costing less than a car), suffer from some degree of unsharpness. To make it less painful, we often call it "softness". This sounds better, especially talking about a thing which cost us some real money. Anyway, this softness shows most of all for the lens wide open and, for a zoom, at the long end. If the problem is not too bad, a small amount of sharpening should help quite a lot, especially if the subject is in focus (or close). As always, it is also recommended (if not absolutely necessary) that the image did not undergo any previous sharpening; therefore this option should rather be turned off (or kept at the lowest available level) in the raw-to-RGB conversion, be in in-camera or in postprocessing.
| Here is an image sample from the MZD 75-300/4.8-6.7 zoom. For Micro Four Thirds that's the EFL of 600 mm, a serious affair. The image (see the full set if you wish) is, well, a bit soft. Let us see if some sharpening/deblurring would help. As before, I'm applying the Focus Magic, comparing it versus Unsharp Mask, and not just once, but each in three strengths, denoted here as Low, Medium and High, or L, M, and H. A total of seven samples, not just three. (When comparing the samples in Swapper, use the numeric keys to jump from one to another. You will be able to catch even very subtle changes, especially if your browser really preloads images as I'm asking it to do.)
| 
E-M1 Mk.II, MZD 75-300/4.8-6.7 @ 300 mm
|
First impression: all six sharpened samples look better than the original: sharper (without excess), no edge artifacts.
This is probably because our scene does not include high-contrast contours like those in the flower example, where our USM M setting was already producing edge halos (small but, excuse my English, pixel-peepable). The result I like most in this set is Focus Magic Medium: not too harsh but strong enough for my taste; eye candy. Better than USM Medium, which is, additionally, excluded from the race by the artifacts mentioned above. | ||

No explicit sharpening |

PSP Unsharp Mask L |

Focus Magic L |

PSP Unsharp Mask M |

Focus Magic M | |

PSP Unsharp Mask H |

Focus Magic H |
|
The bottom line of this small case study is that, for the time being, at least, I'm adding Focus Magic in my Medium setting as a default to my postprocessing workflow for pictures shot with this lens; at least those in focus, with no need for any special sharpening.
Another of my lenses which could use some help: the pancake MZD 14-42/3.5-5.6 EZ, delightfully small, cute and handy, but quite soft, especially at the wide end.
| This, again, is a frame from my standard lens trials. While quite soft when viewed in full pixel size, it is really not so bad; after all, it can be used to make presentable 9×12-inch prints. Still, let's deblur it with USM and Focus Magic using Medium settings from the previous sample. The results are shown below. Indeed, Focus Magic brings some significant relief, even if not as visually pleasing as last time. First, the original seems a bit more blurry, then the scene has more contrast, with steep transitions. This also is a reason that USM shows more artifacts, with the Magic showing more advantage over it than before. Actually, a closer look at the larger samples in Swapper reveals a quite impressive amount of detail; well beyond anything I was ever able to get from a 35-mm negative or slide. Looks like this is another lens for which Focus Magic will become a standard part of my workflow, regardless of any focus problems.
| 
E-M1 Mk.II, MZD 14-32/33.5-5.6 @ 14 mm
| | ||

No explicit sharpening |

PSP Unsharp Mask |

Focus Magic |
|
This frame, borrowed from my study of the E-M1 Mk. II Super Hi-Res Mode, has a nominal pixel resolution of 80 MP (10,368×7.776). See the article for how this is possible with a 20 MP camera.
| Here is what I saw in these samples.
| 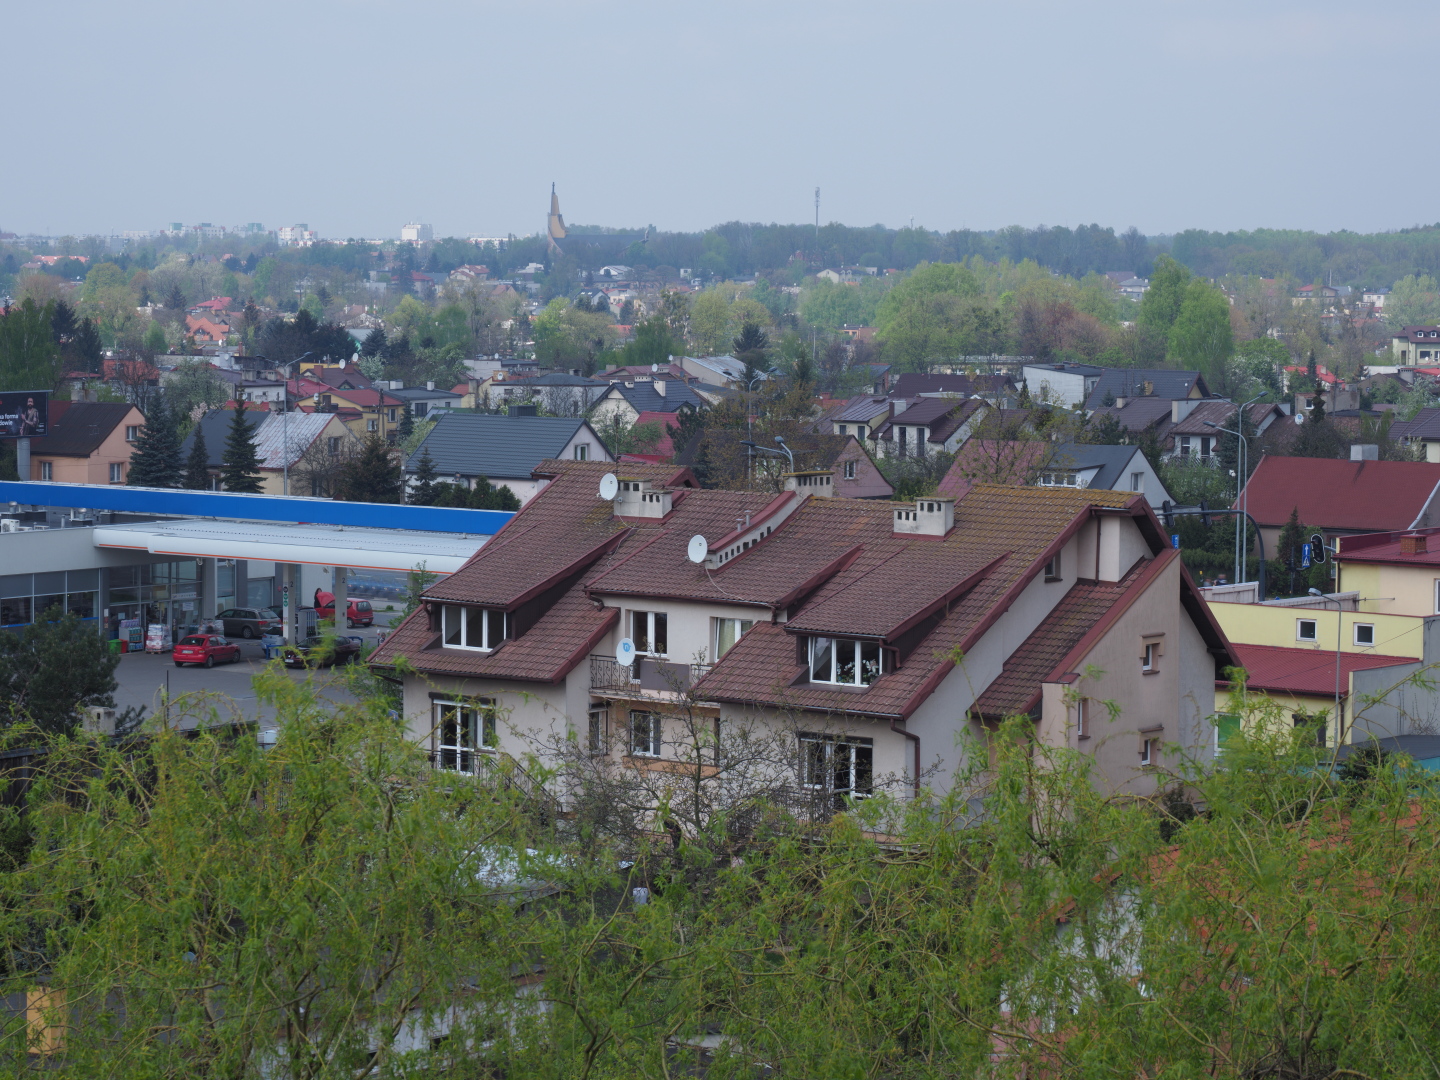
E-M1 Mk.II, MZD 12-100/4.0 @ 50 mm
| |

Original 80 MP JPEG, no sharpening |

PSP Unsharp Mask; Radius = 2, Strength = 100, Clipping = 6 |

Focus Magic: Width=3; Strength=100% |
|
Again, Focus Magic seems to hold some advantage here, with USM performance limited by artifacts it may create. (These, however, may make a favorable impression if viewed under smaller magnifications, so for some, mostly mass-market, applications, USM may still be the preferred choice.)
|
|
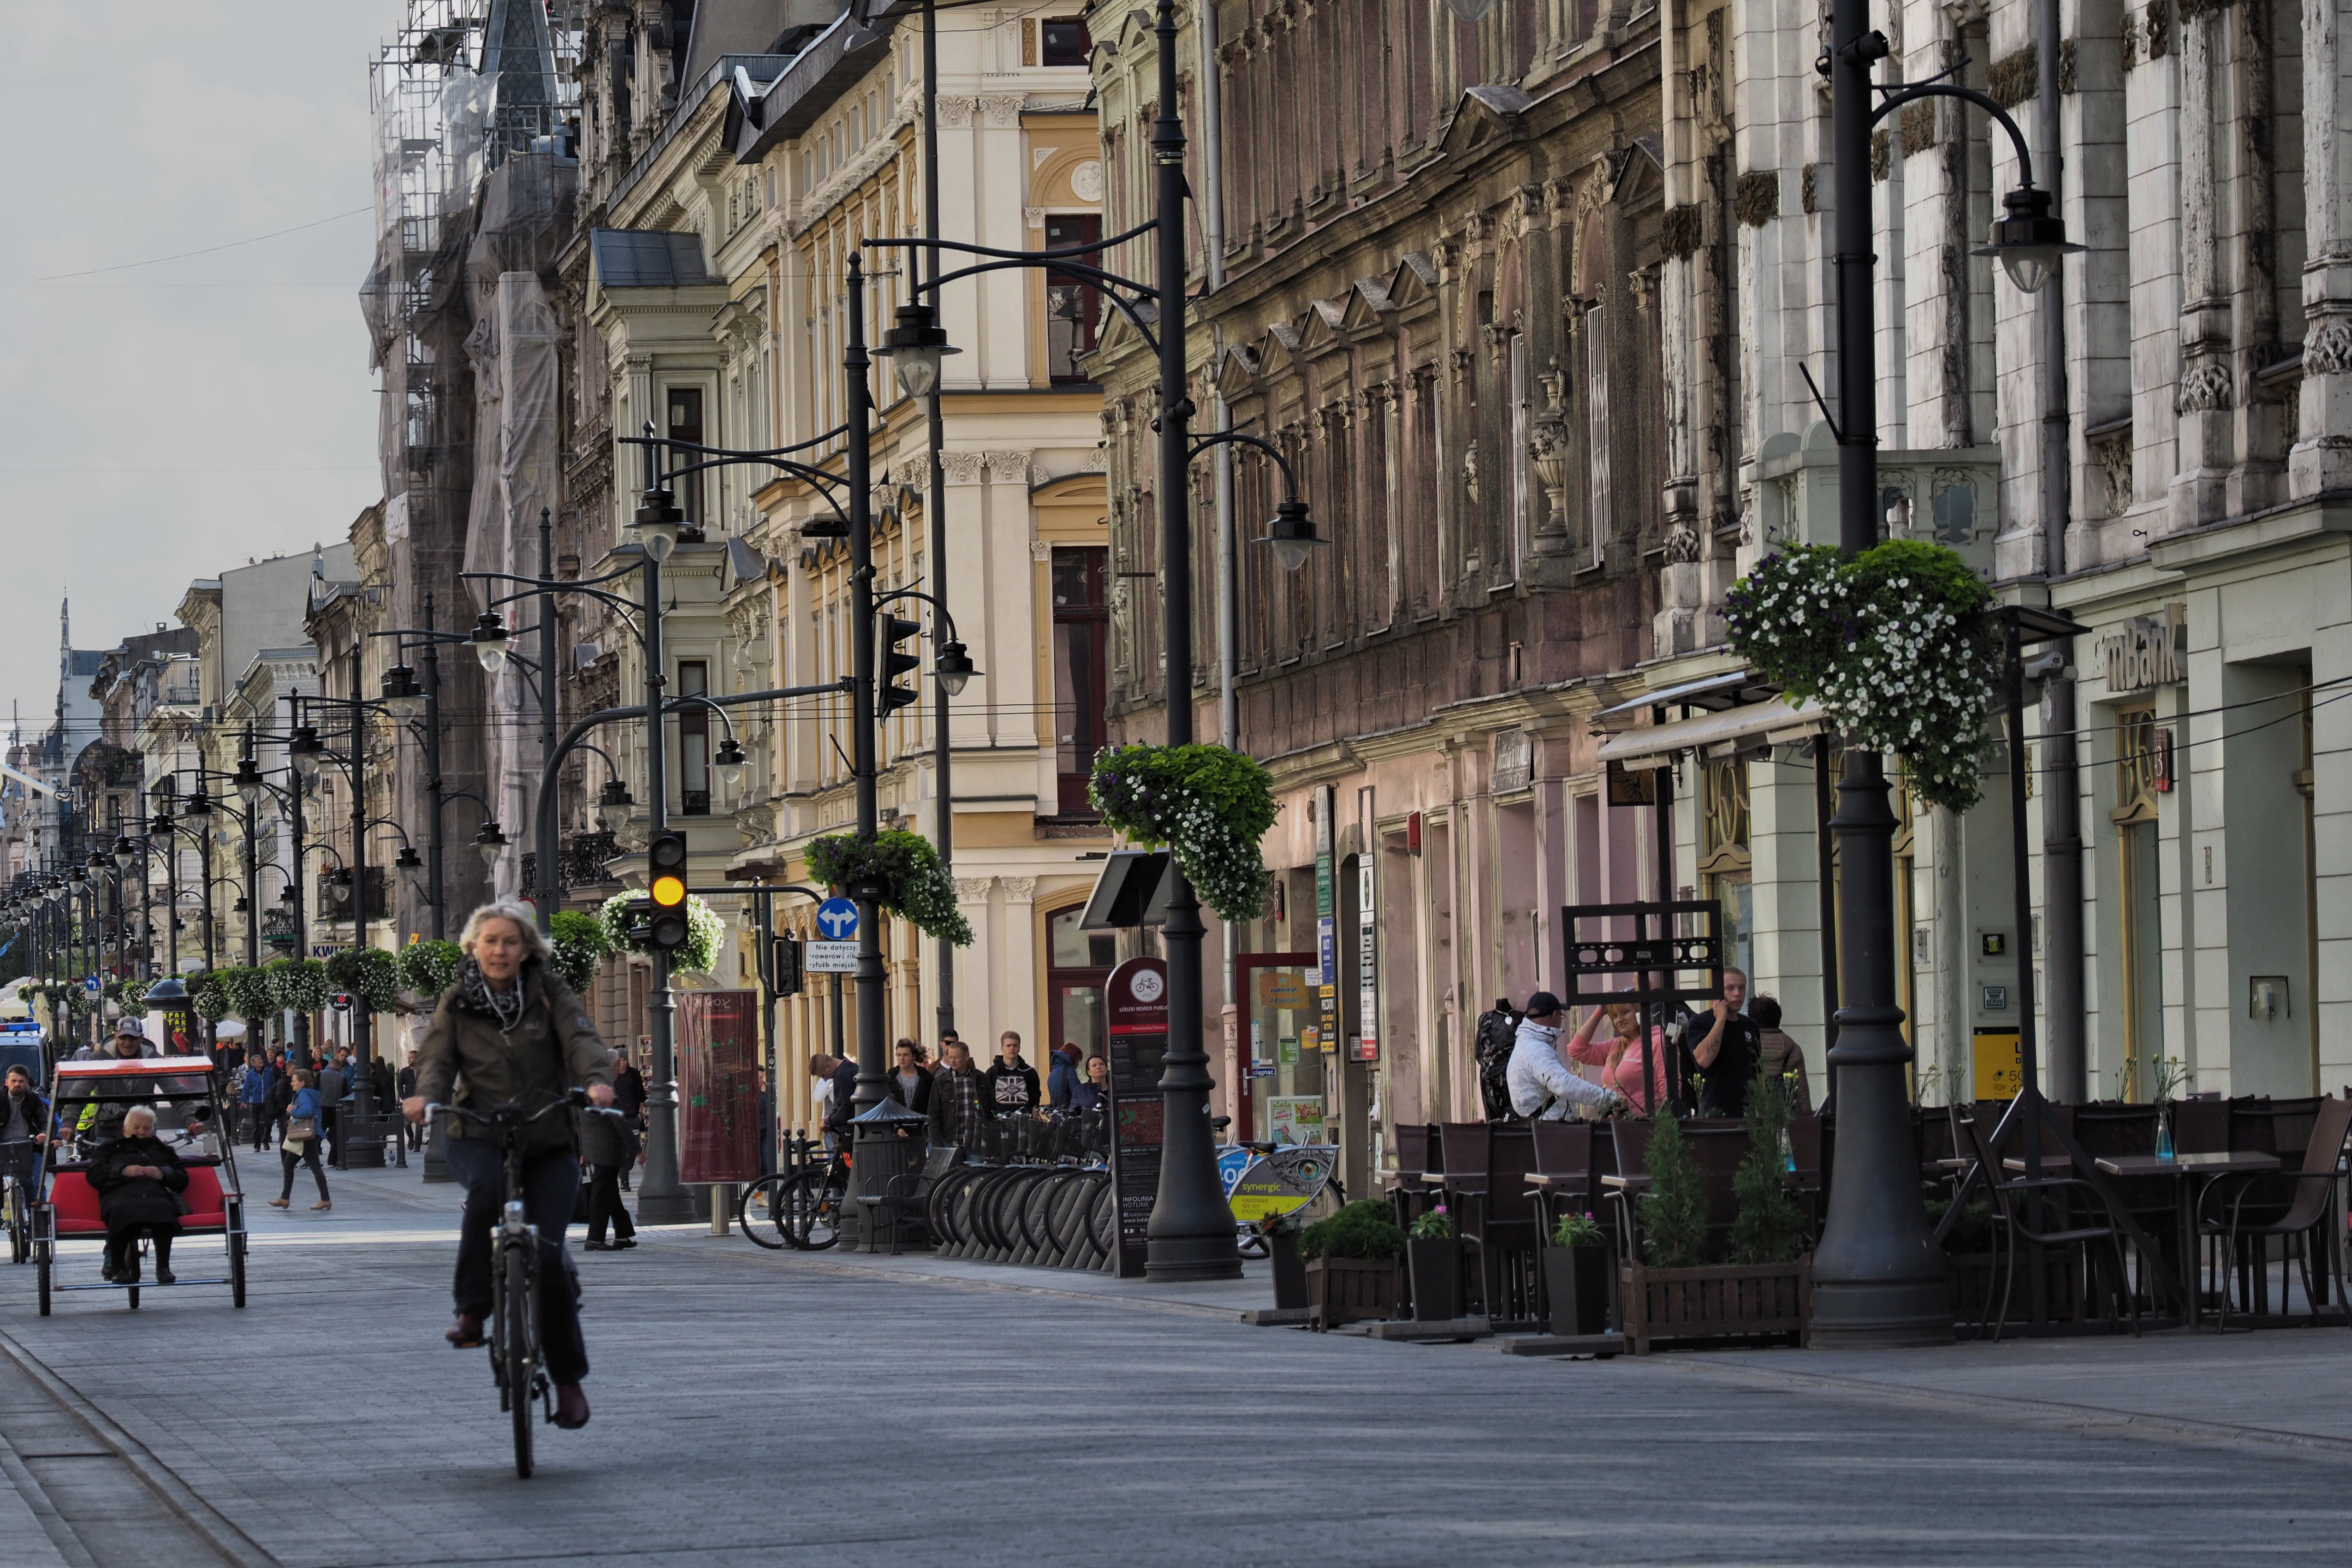
This would be a nice street shot, if not for the bike rider, badly out of focus. Here are my attempts to fix the problem: first with Unsharp Mask, and then — with Focus Magic.
Surprisingly, both tools succeed to make the rider's face (almost) presentable, as can be seen in the samples below. The problem is that this calls for very aggressive sharpening, which, when applied to the whole image, brings a total disaster to the background scene, as shown in the bottom row of samples below. The obvious (ad, I think, only) solution, is to draw a feathered mask around the rider and her bike, apply the aggressive sharpening inside, then invert the mask and sharpen the outside just a little, as needed; see the top row. With some luck (and masking experience) the transition will not be obvious, and the picture will be fixed.
| 
E-M1 Mk.II,, MZD 12-100/4.0 @ F/4.0
| ||||

Postprocessed in-camera JPEG In the top row samples, the filters use different settings inside and outside the mask area (drawn reasonably close around the subject), with the deblurring much stronger inside. In the bottom row, the same (stronger) settings are used for the whole frame, with some nasty artifacts in the detailed background, see Swapper samples #4 and #5. |

PSP 20 Unsharp Mask
|

Focus Magic (plugin)
|

PSP 20 Unsharp Mask
|

Focus Magic (plugin)
|
|
Lo and behold! — this did work. Maybe not a National Geographic job, but passable, even with my clumsy, hand-drawn mask. See the Swapper samples.
Now, comparing the USM versus Focus Magic. While USM works like I expected at this blur magnitude, the Magic really excels here. A clear winner, and no visible artifacts; not in the face area at least. Impressive, to say the least. The stand-alone version of Focus Magic has an option of mage upsampling (resizing) by a linear factor of 2× or 4×. The program is supposed to improve contour sharpness of the result, and do antialiasing: smooth the jaggies emerging on slanted lines.
| For this experiment I chose one of a dozen of pictures shot in 2000 and then mysteriously lost, not to be found in any backup, or on any media to be undeleted; once-in-a-lifetime snafu. All I could find were XGA (1024×768) copies fir the Web Here is one, a whopping 0.8 megapixels. The thumbnail links to the actual image to be upsampled. In addition to Focus Magic, I've upsampled this image with two other application s I'm frequently using: the Fast Stone image browser/manager and Paint Shop Pro 20, my current photo editor of choice.
| 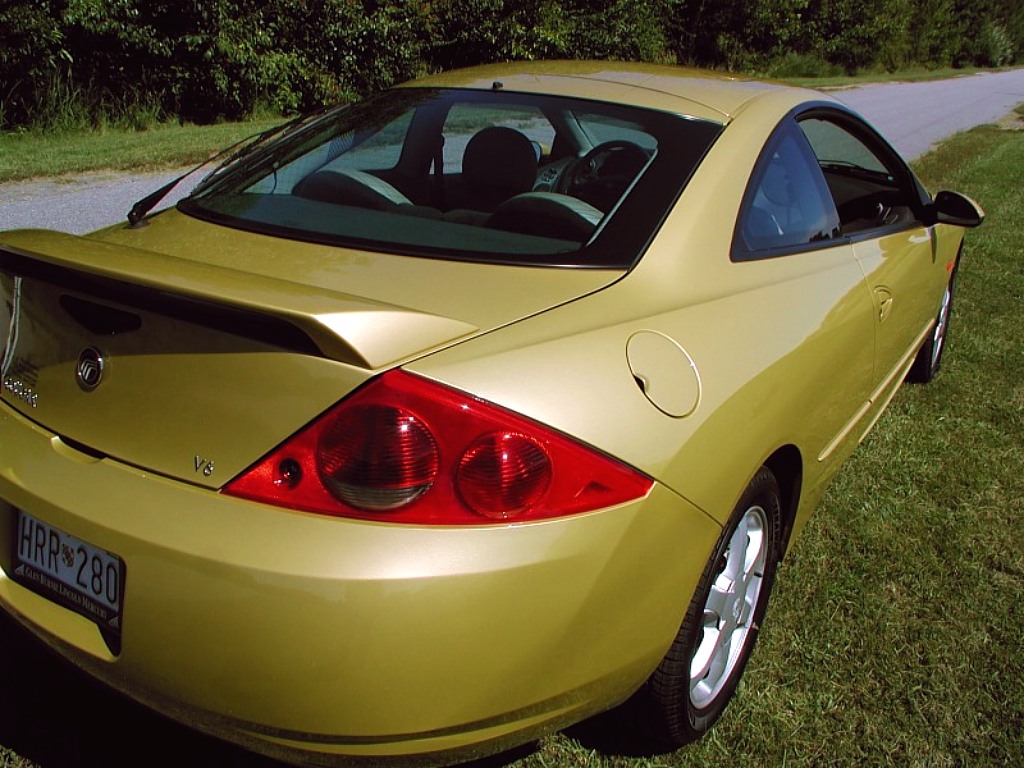
Olympus C-3000Z, exposure and other data lost | |

Fast Stone (default settings)
|

Paint Shop Pro 20 |

Stand-alone Focus Magic |
|
Somewhat disappointing, the results for all three applications are virtually identical, regarding both contour sharpness and aliasing (quite a lot of it). I can see no advantage of Focus Magic in these areas over general-purpose software. No magic here.
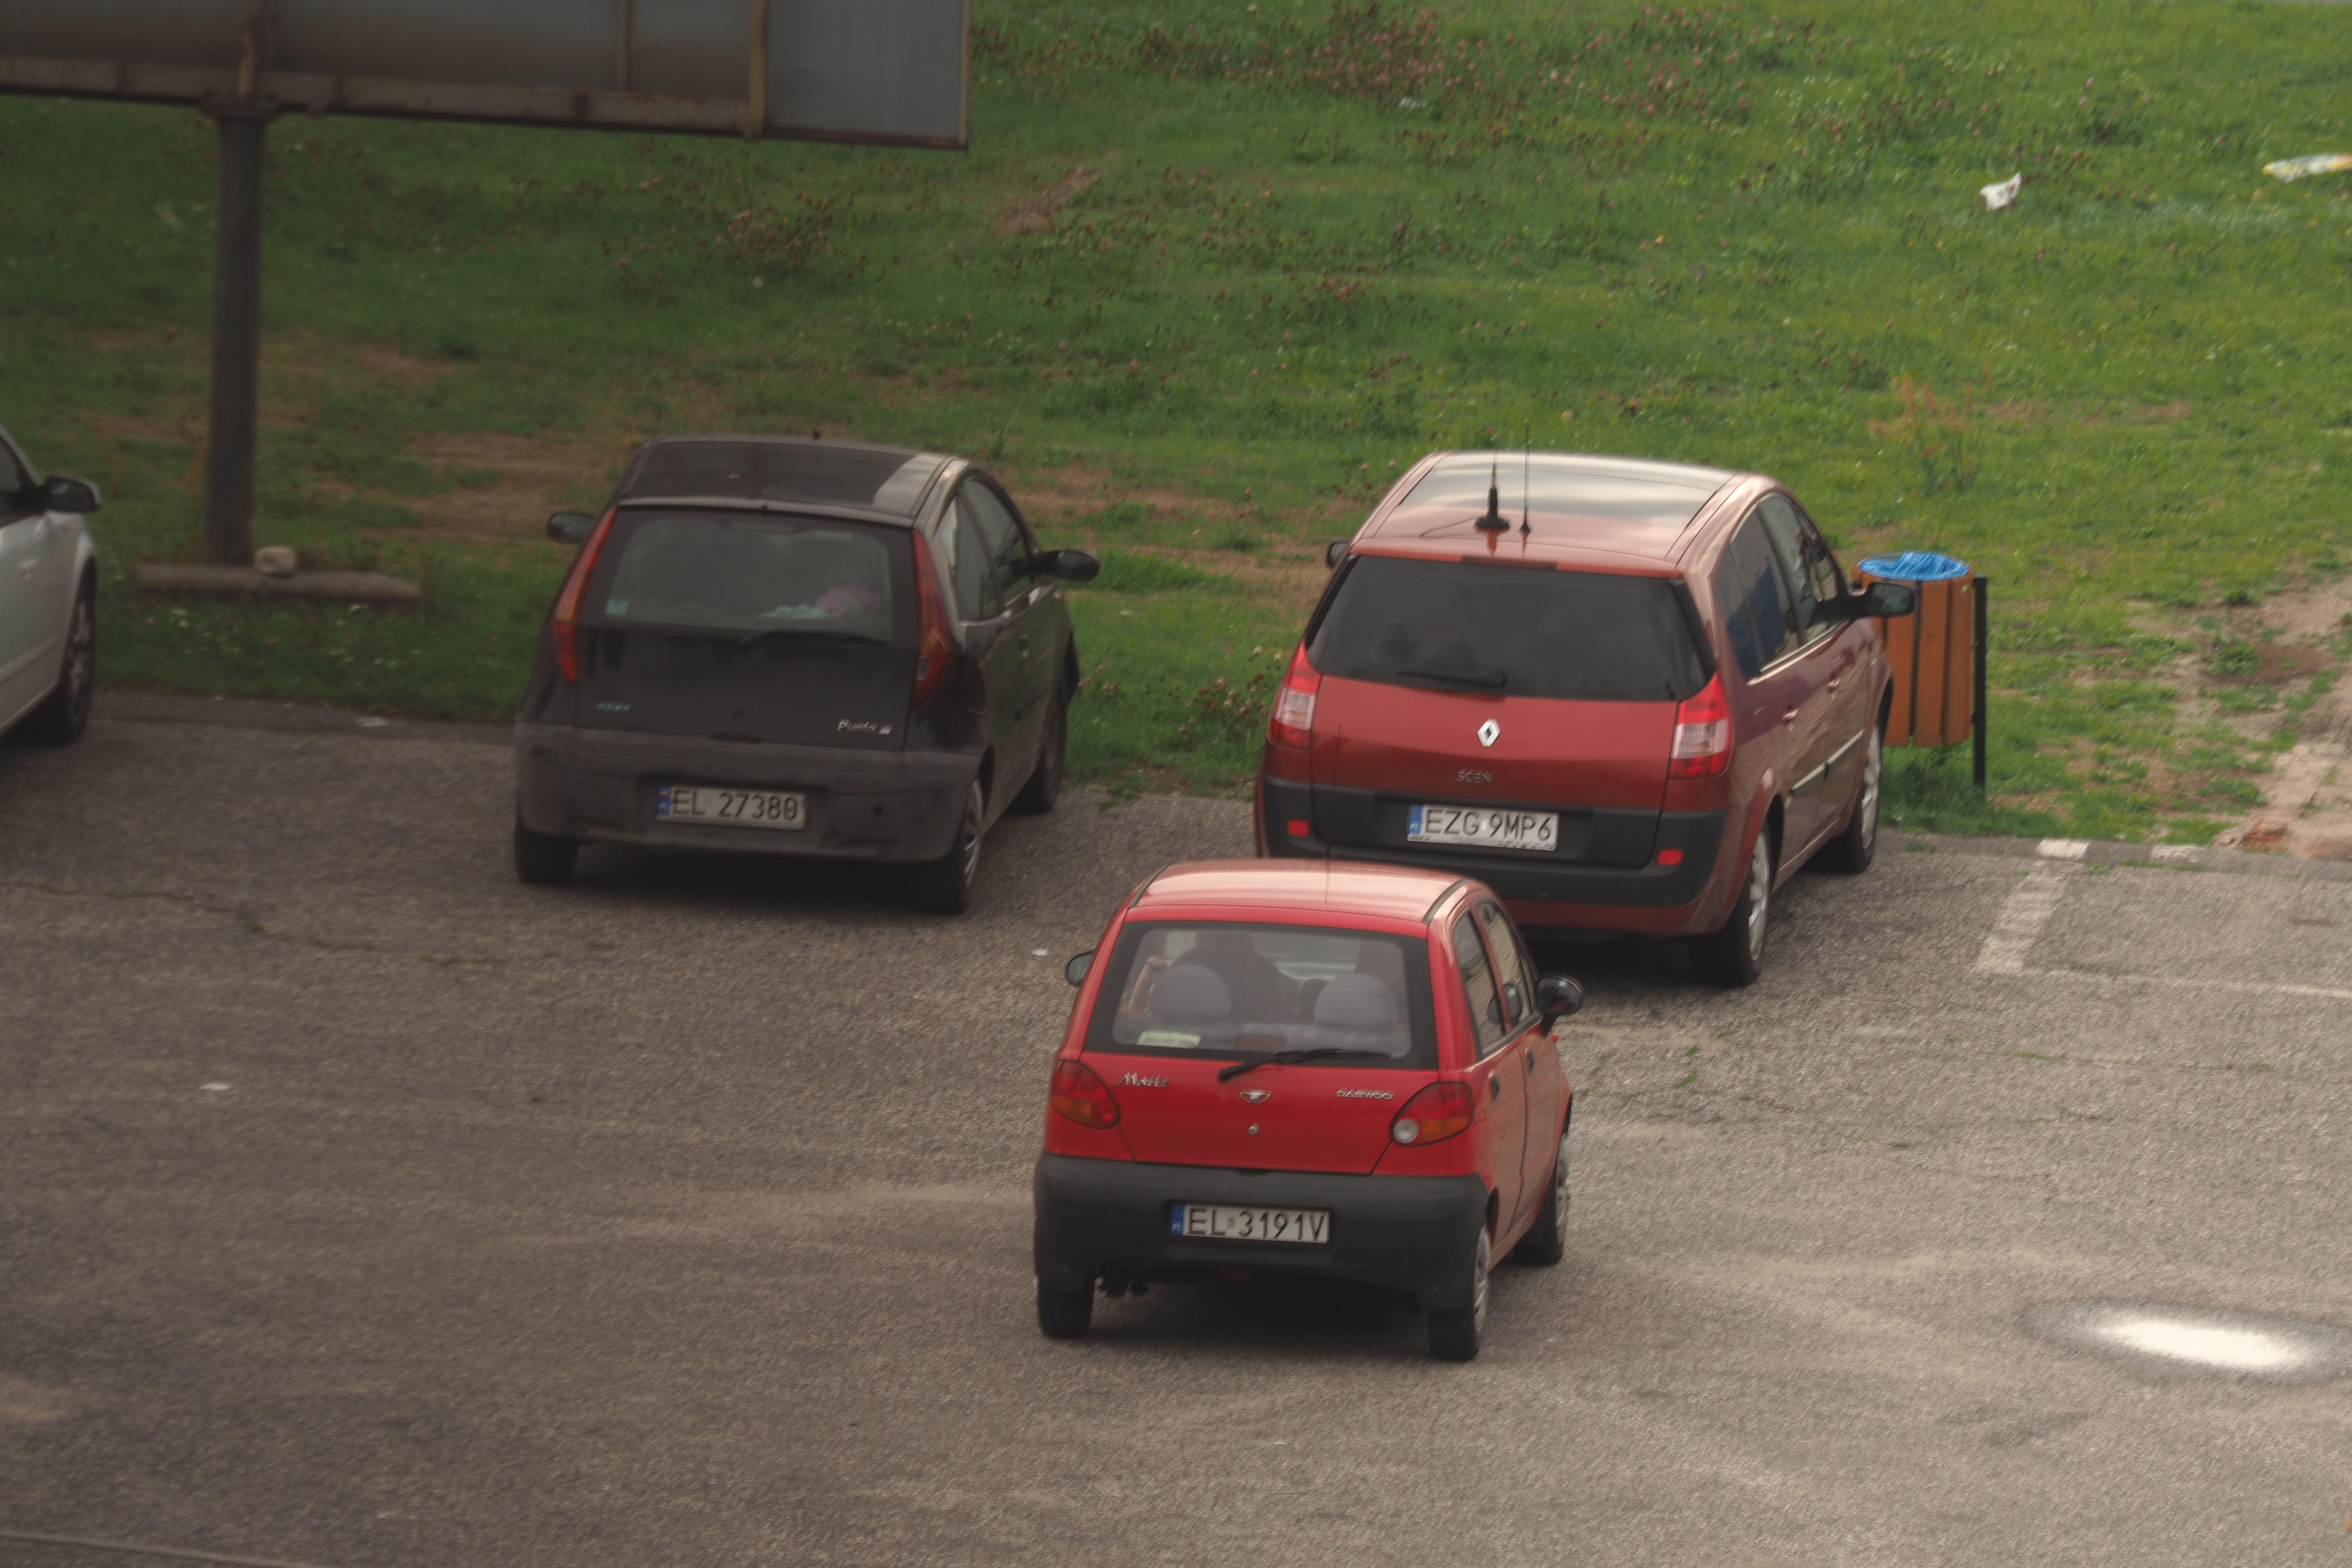
This function requires the user to specify the blur magnitude (pixel shift) and direction, what indicates that it works best with the blur caused by camera shake (being more or less uniform across the whole frame) than for that due to subject movement (which will vary). The latter may require applying various corrections in various masked areas.
| For this test I've shot a dozen or so frames with a 300 mm lens (600 mm EFL), handheld, at IS0 64, not trying to hold the camera steady, but with image stabilization on, to emulate my normal shooting conditions. With the resulting shutter speeds around 1/25s, I found two frames with the blur of 10 pixels or so; one of them is shown here. Setting the blur size and direction parameters is not complicated, but tedious, requiring some trial and error. I'm showing here the results for two different sets.
| 
Olympus E-M1 Mk.II, MZD 75-300/4.8-6.7 @ 300 mm | |

Original |

Settings One |

Settings Two |
| This page is not sponsored or endorsed by any product maker or distributor and presents solely the views of the author. |
| Home: wrotniak.net | Search this site | Change font size |
| Posted 2018/07/20 | Copyright © 2018 by J. Andrzej Wrotniak |