
|
Dark Noise and Hot Pixels in the Olympus E-30 |
|
|
My other articles related to the |
|
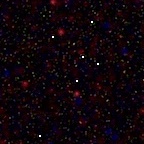
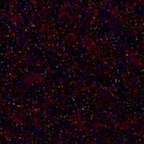
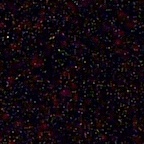
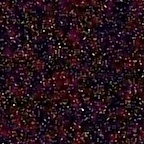
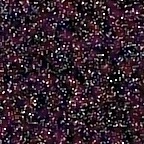
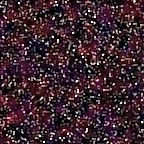
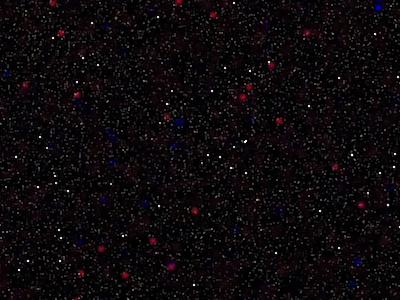
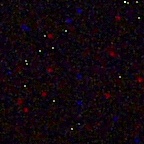
Dark noise shows up in pictures only areas receiving only a minimum amount of light, below or close to that resulting in any "legitimate" sensor response. It consists from both a static (pixel-to-pixel) component and a random (frame-to-frame for the same pixel) one; for more on these refer to my noise article. Knowing the nature of dark noise in a given camera gives us some information about its imaging performance at long exposures and/or high ISOs; this is why I go through the same (or similar) exercise for every camera I'm planning to use. In particular, you may find similar studies for the E-510 and E-3, although only in the latter case the method used was exactly like here, which makes all image samples (manipulated or not) directly comparable. Now, if you do not like to go into the minutiae of this presentation, just jump to the conclusions; you may find them useful. Otherwise proceed. Noise image samples These are "lens cap shots", i.e. pictures taken in absence of any light reaching the imager (with both the lens and viewfinder covered). They approximate well what we may see in the deepest shadows of an actual picture, possibly superimposed on top of other parts. The image processing parameters were set up to nominal values as in the e-3 experiment: SHQ (1:2.7) JPEGS were generated in-camera set to Natural picture mode with contrast -2 and sharpness at N-1, no saturation adjustment, WB at 5300K, noise filtering at Off. For most of the samples, noise reduction (subtraction of the dark frame) was not used — except a few, where it is stated in respective captions. For analysis, I've been using small cropped areas, all taken from the same place in the frame (x=2000, y=1500), sized 144×144 pixels. These will be shown is 1:1 pixel scale in most tables below. To make noise effects easier to compare between samples, most of these were stretched (or re-equalized) in postprocessing, with the 0..64 luminance interval expanded to the full 0-255 range; roughly speaking, the visible noise (but also the black level) were therefore multiplied by four. As an illustration of that process, here is the same sample before and after such stretching. This one was at 60 seconds, at ISO 400. |
|
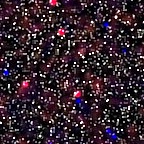
You can clearly see the "hot pixels", always in the same place. They are actually clusters, usually 2×2 squares; an effect of raw-to-RGB conversion. The larger, fainter blobs most probably show a photosite affecting its neighbors. You can see that at far right, in a tiny (15×15) fragment of the image magnified ten times, but with no stretching. |

|
|

|
| Straight | Stretched | 10×, no stretch | |
| Exposure of 60 seconds at ISO 400 | |||
|
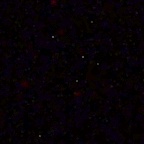
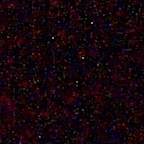
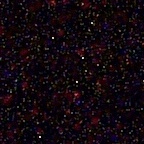
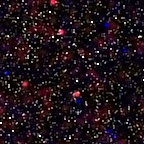
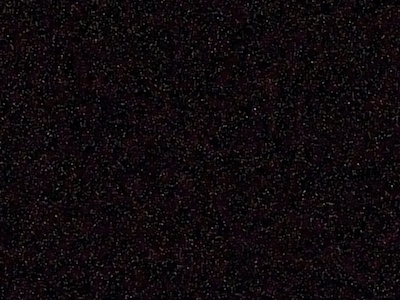
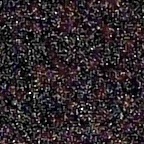
Dependency on ISO and exposure time Here are stretched samples at various ISOs, and exposures ranging from 1/4 to 60 seconds. |
|
| ||||||

|

|

|

|
| ||
| ISO 100, 1/4 s | ISO 100, 1 s | ISO 100, 4s | ISO 100, 15 s | ISO 100, 60s | ||

|

|

|

|
| ||
| ISO 200, 1/4 s | ISO 200, 1 s | ISO 200, 4s | ISO 200, 15 s | ISO 200, 60s | ||
|
|

|
|
| ||
| ISO 400, 1/4 s | ISO 400, 1 s | ISO 400, 4s | ISO 400, 15 s | ISO 400, 60s | ||
|
|
|
|
| ||
| ISO 800, 1/4 s | ISO 800, 1 s | ISO 800, 4s | ISO 800, 15 s | ISO 800, 60s | ||
|
|

|

|
| ||
| ISO 1600, 1/4 s | ISO 1600, 1 s | ISO 1600, 4s | ISO 1600, 15 s | ISO 1600, 60s | ||
|
|
|
|
| ||
| ISO 3200, 1/4 s | ISO 3200, 1 s | ISO 3200, 4s | ISO 3200, 15 s | ISO 3200, 60 s | ||
|
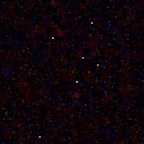
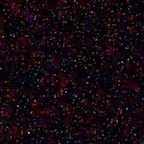
At ISO 100, even aided by sample stretching, you can barely see any dark noise at exposures up to 15 seconds; at 60 s we have some hot pixels which, as my experience shows, will be removed without a trace by noise reduction. While we can see both the noise and the black level (average brightness of the dark frame) increasing already at ISO 200, this is nothing objectionable — in non-stretched samples (or prints) this is hard to notice; see the previous section on how stretching affects what we see. It is only at ISO 1600 and above where the effect becomes visible with naked eye, see below. Note that, for example, a 60-second exposure at ISO 100 and a 15-second one at ISO 1600 both correspond to the same scene illumination, which means you could use them equally well under some circumstances (or 30 s at ISO 200, 15 s at ISO 400, 8 s at ISO 800, 2 s at ISO 3200; sorry for stretching your patience). The 60 s sample, however, turns out to be the cleanest, and by far. Therefore a rule of thumb is: the only reason to use ISOs higher than 100 is to assure a handholdable shutter speed. Once we have to use a tripod, we may as well go for ISO 100; the length of exposure no longer matters! This means that any samples I'm showing for high ISOs and exposures longer than 1/4 s or so are of only academic interest, just to see the patterns of behavior. ISO 3200 at 5 seconds, for example, has absolutely no practical meaning, and using it for any purpose would just mean that you're not paying attention. Samples without stretching; Noise Reduction Just to show how your shadows may really look (when pixel-peeped, that is), here are some samples, larger crops, shown without stretching. This may be also a good place to show how Noise Reduction (NR) affects the resulting images. (If you are not sure how that differs from Noise Filtering, go back to the article I'm mentioning at he top.) I am showing only samples at 1/4 s and 60 s for two ISO settings; this should be enough to give you an idea on what's going on. Note that Here I've set NR to On (not the generally recommended Auto), forcing the camera to use it, as opposed to letting it make its own decision.
|
|
| ||

|

| |
| ISO 400, 1/4 s, NR off | ISO 400, 1/4 s, NR on | |

|

| |
| ISO 400, 60 s, NR ff | ISO 400, 60 s, NR on | |
|

| |
| ISO 3200, 1/4 s, NR off | ISO 3200, 1/4 s, NR on | |
|

| |
| ISO 3200, 60 s, NR off | ISO 3200, 60 s, NR off | |
|
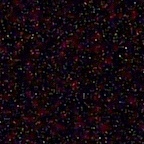
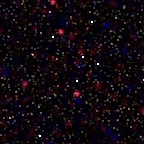
At 1/4 s, ISO 400 is quite clean to start with (even if the noise level increase is clearly seen in the stretched sample, compare the previous section). The forced Noise Reduction makes is worse, if just by a bit (if you have a clean monitor surface, you should see it). This is because the NR has an undesirable effect of raising the level of random noise; nothing comes free. The 60-second exposure at ISO 400 would be not much worse, if not for the hot pixels, showing up in a disturbing number. Here Noise Reduction really helps, cleaning them up nicely, at the expense, again, of a moderate increase of the low-amplitude component. A similar pattern can be seen for ISO 3200. At 1/4 s there is no benefit of Noise Reduction, even if the side-effects are more clearly visible; at 60 s the NR works: even if the random noise increased quite significantly, the hot pixels are cleaned up just fine. Once again: the 60-second frame is shown for educational purposes only, see above. It makes a point, though. The samples shown here seem to show no banding pattern — still, we will investigate that later. Compared to the E-3 It will be interesting to compare the E-30 against the Olympus E-3 flagship; a side-by-side comparison, even of limited scope, may be better here than just referring you to the relevant article. So here it goes. As this is a comparison, I chose to show stretched samples in this section; no Noise Reduction applied. |
|
| ||||||
|

|

|

|

|
| |
| ISO 100, 60 s | ISO 200, 15 s | ISO 400, 4s | ISO 800, 1 s | ISO 1600, 1/4s | ISO 3200, 1/4s | |
|
|
|
|
|
|
| |
|
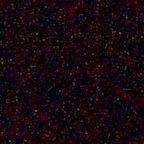
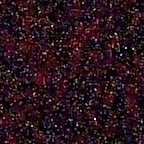
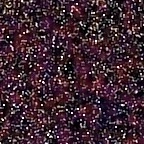
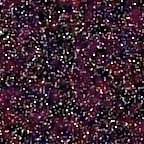
Interesting: ISOs from 200 to 800 look almost identical (at selected exposures at least), but the extra-long 60 seconds at ISO 100 is much cleaner in the E-30. In turn, ISO 3200 at 1/4 s looks better in the E-3, if not by much. Then, the ISO 1600 samples for both cameras are quite different in noise patterns: E-30 is a bit blotchy, I like the E-3 slightly more here. In general, I would consider the differences not decisive in favor of either camera. Just somewhat different way of doing things. Banding I have no idea if this effect, visible in quite many digital cameras of the past, comes from the sensor itself, or from the signal processing. It may be both, with some subtle interplay of denoising procedures. The bad news is that noise-removal programs do not help much about it; these are large-scale effects. Noise banding is best seen in larger fragments of an image; therefore for the sake of presentation I'm using a different way of showing it. First, an image is luminance-stretched (by a factor of four, again), then reduced in size to 800×600 pixels, and then a 400×300 center fragment is cropped out for presentation. Thus remember that the effect is, again, exaggerated in magnitude, but you are viewing it reduced to one half of the actual pixel size. To make things more interesting, in the left column I'm showing identically processed samples for the E-3. |
|
| ||

|

| |
| E-3, ISO 800, 1/4 s | E-30, ISO 800, 1/4 s | |

|

| |
| E-3, ISO 800, 4 s | E-30, ISO 800, 4 s | |

|

| |
| E-3, ISO 1600, 1/4 s | E-30, ISO 1600, 1/4 s | |

|

| |
| E-3, ISO 1600, 4 s | E-30, ISO 1600, 4 s | |

|

| |
| E-3, ISO 3200, 1/4 s | E-30, ISO 3200, 1/4 s | |

|

| |
| E-3, ISO 3200, 4 s | E-30, ISO 3200, 4 s | |
|
There are two things we can notice here:
While with in the E-3 banding was just an occasional problem, showing up with some subjects only, it has been significantly reduced in the E-30, which may be the biggest difference between both cameras' performance, noise-wise at least. Generally, I see no big differences in dark noise in Olympus SLRs since they switched from CCD to NMOS sensors in the E-510 (and that was a visible improvement). This shows that there were no revolutionary developments in imager technology since 2007, just some gradual refinements or tweaks. Any differences I could see can be explained by changes to the processing (noise-removal) software, not to the imager itself. In the E-30, dark noise does not become an issue at all up to ISO 1600, and hot pixels, which may show at very long exposures (say, one minute) even at lowest ISOs are efficiently cleaned up by the dark frame subtraction used in Noise Reduction. Two things are worth remembering:
|
|
|
My other articles related to the |
| Home: wrotniak.net | Search this site | Change font size |
| Posted 2009/06/29 | Copyright © 2009 by J. Andrzej Wrotniak. |