
...or to Infrared Photography
|
Infrared Photography with the Olympus E-300 |
|
|
|
Back to the Olympus E-System...
...or to Infrared Photography |
|
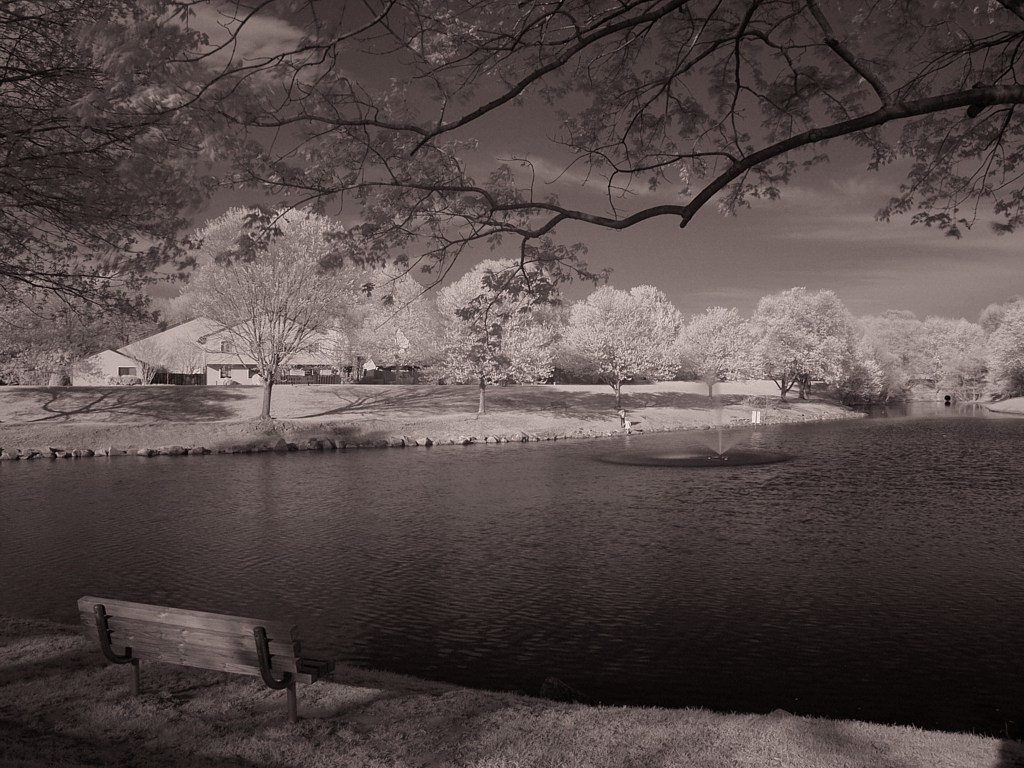
Read first my general remarks on digital IR photography, as they are all applicable here. The samples: Hoya R72 Here is an example from a shooting session on an April afternoon, with the camera equipped with the "standard" 14-45 mm zoom lens, set near the wide end. One picture was taken without the IR filter, and another with the Hoya R72 one; the latter is shown as taken and in two postprocessed, monochrome versions. The images were saved as HQ JPEGs. The in-camera processing settings were in both cases: sharpness at -2, contrast at -1, saturation at 0, auto white balance. | ||
|
| |
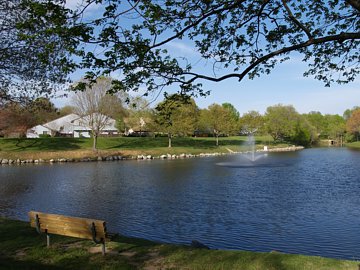
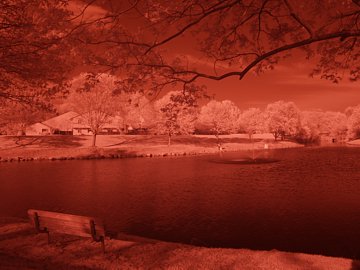
| [1] No filter, ISO 200, program exposure with -0.3 EV compensation: 1/400 s at F/8, no postprocessing except size reduction and re-sharpening. | [2] The same scene; Hoya R72, ISO 200, manual exposure of 1/4 s at F/4.5, no postprocessing except size reduction and re-sharpening. | |
|
| |
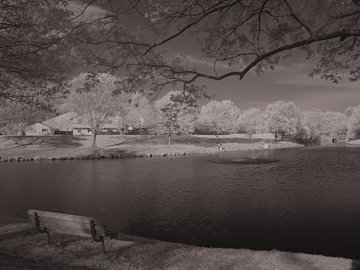
| [3] Image [2] after applying almost total (-90) color desaturation in Photo-Paint; some warm tint is left (easy to see if your monitor is properly calibrated). | [4] Image [3] with some tonal adjustment: histogram slightly stretched and mid-tones moved down a bit. Here is a larger, XGA version. | |
|
Note the well-pronounced Woods effect in the trees; even the foreground branches, almost black in the color version, got some exposure in infrared. The sky was slightly overcast, therefore it is not as dark as it would have been otherwise. The contrast after desaturation is quite low, as usual; the final re-equalization is a matter of taste. For those who would like to check for themselves, the full-size, original image [2] can be found here (3.6 MB); just have mercy upon my bandwidth. You may also use this file to check how the picture will turn out with postprocessing other than what I've used. Exposure and focus As expected, the camera metering is not very useful in infrared. Pictures taken at the auto setting turned out to be heavily underexposed — my estimate is about 4EV, at least in this kind of light. I ended up using manual exposure, set by trial and error, based on instant review of taken images. If you would like to rely on automatics, a +4 EV (or slightly higher) compensation would be recommended. Looks like this correction is not really sensitive to the kind of light (time of the day, weather) and kind of subject, therefore I'm using it now on a permanent basis, in order to avoid manual exposure settings, and the results are good. (Just remember to re-adjust the compensation when you take the filter off!) The comparison of the exposure data of images [1] and [2] shows that the necessary exposure multiplier is about 150x, close to 7.3 EV. This is a bit surprising, as for other Olympus cameras I've tried the multiplier was between 2400× and 3000×, i.e., 16 to 20 times higher. It turns out that the E-300 is much more sensitive to infrared, more than most digital cameras I know. According to Jens Rösner, the most sensitive digital cameras have IR compensation factor of about 6.3 EV, and among SLRs the Pentax *ist DS boasts the value of 6.7 EV, to which the E-300 comes close. I left the camera in autofocus mode, and the focus turned out to be OK. At longer focal lengths, however, I would expect et least some AF error, so stepping down the lens might be in order. Color balance Some people express a preference for this or that way of setting the color balance in infrared shooting. I never had one, content to have it set to auto. This time, however, I decided to check it out, and here are the results. | ||
|
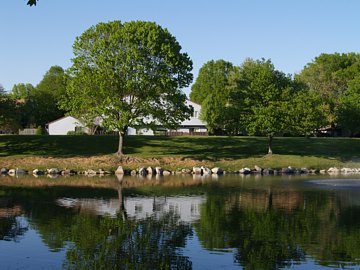
As usual in these pages, the image [5] at the right shows the scene shot in visible light (May, late afternoon). The two which follow (each in two versions: original and after 90% desaturation) were shot within seconds from the first with the WB set to auto and to 3000K (tungsten), respectively. The pictures were taken with the E-300's standard 14-45 mm zoom at 30 mm, autofocus, using a tripod. Sharpness was at -1, contrast at -2, saturation at 0; other data is given in captions. Note that in this series I was already confident in IR auto-exposure with a +4 EV compensation, determined in my previous experiments. |
| |
| [5] No filter; aperture priority with -0.3 EV compensation: 1/125 s at F/11 and ISO 200, auto WB. | ||
.t.jpg)
|
.t.jpg)
| |
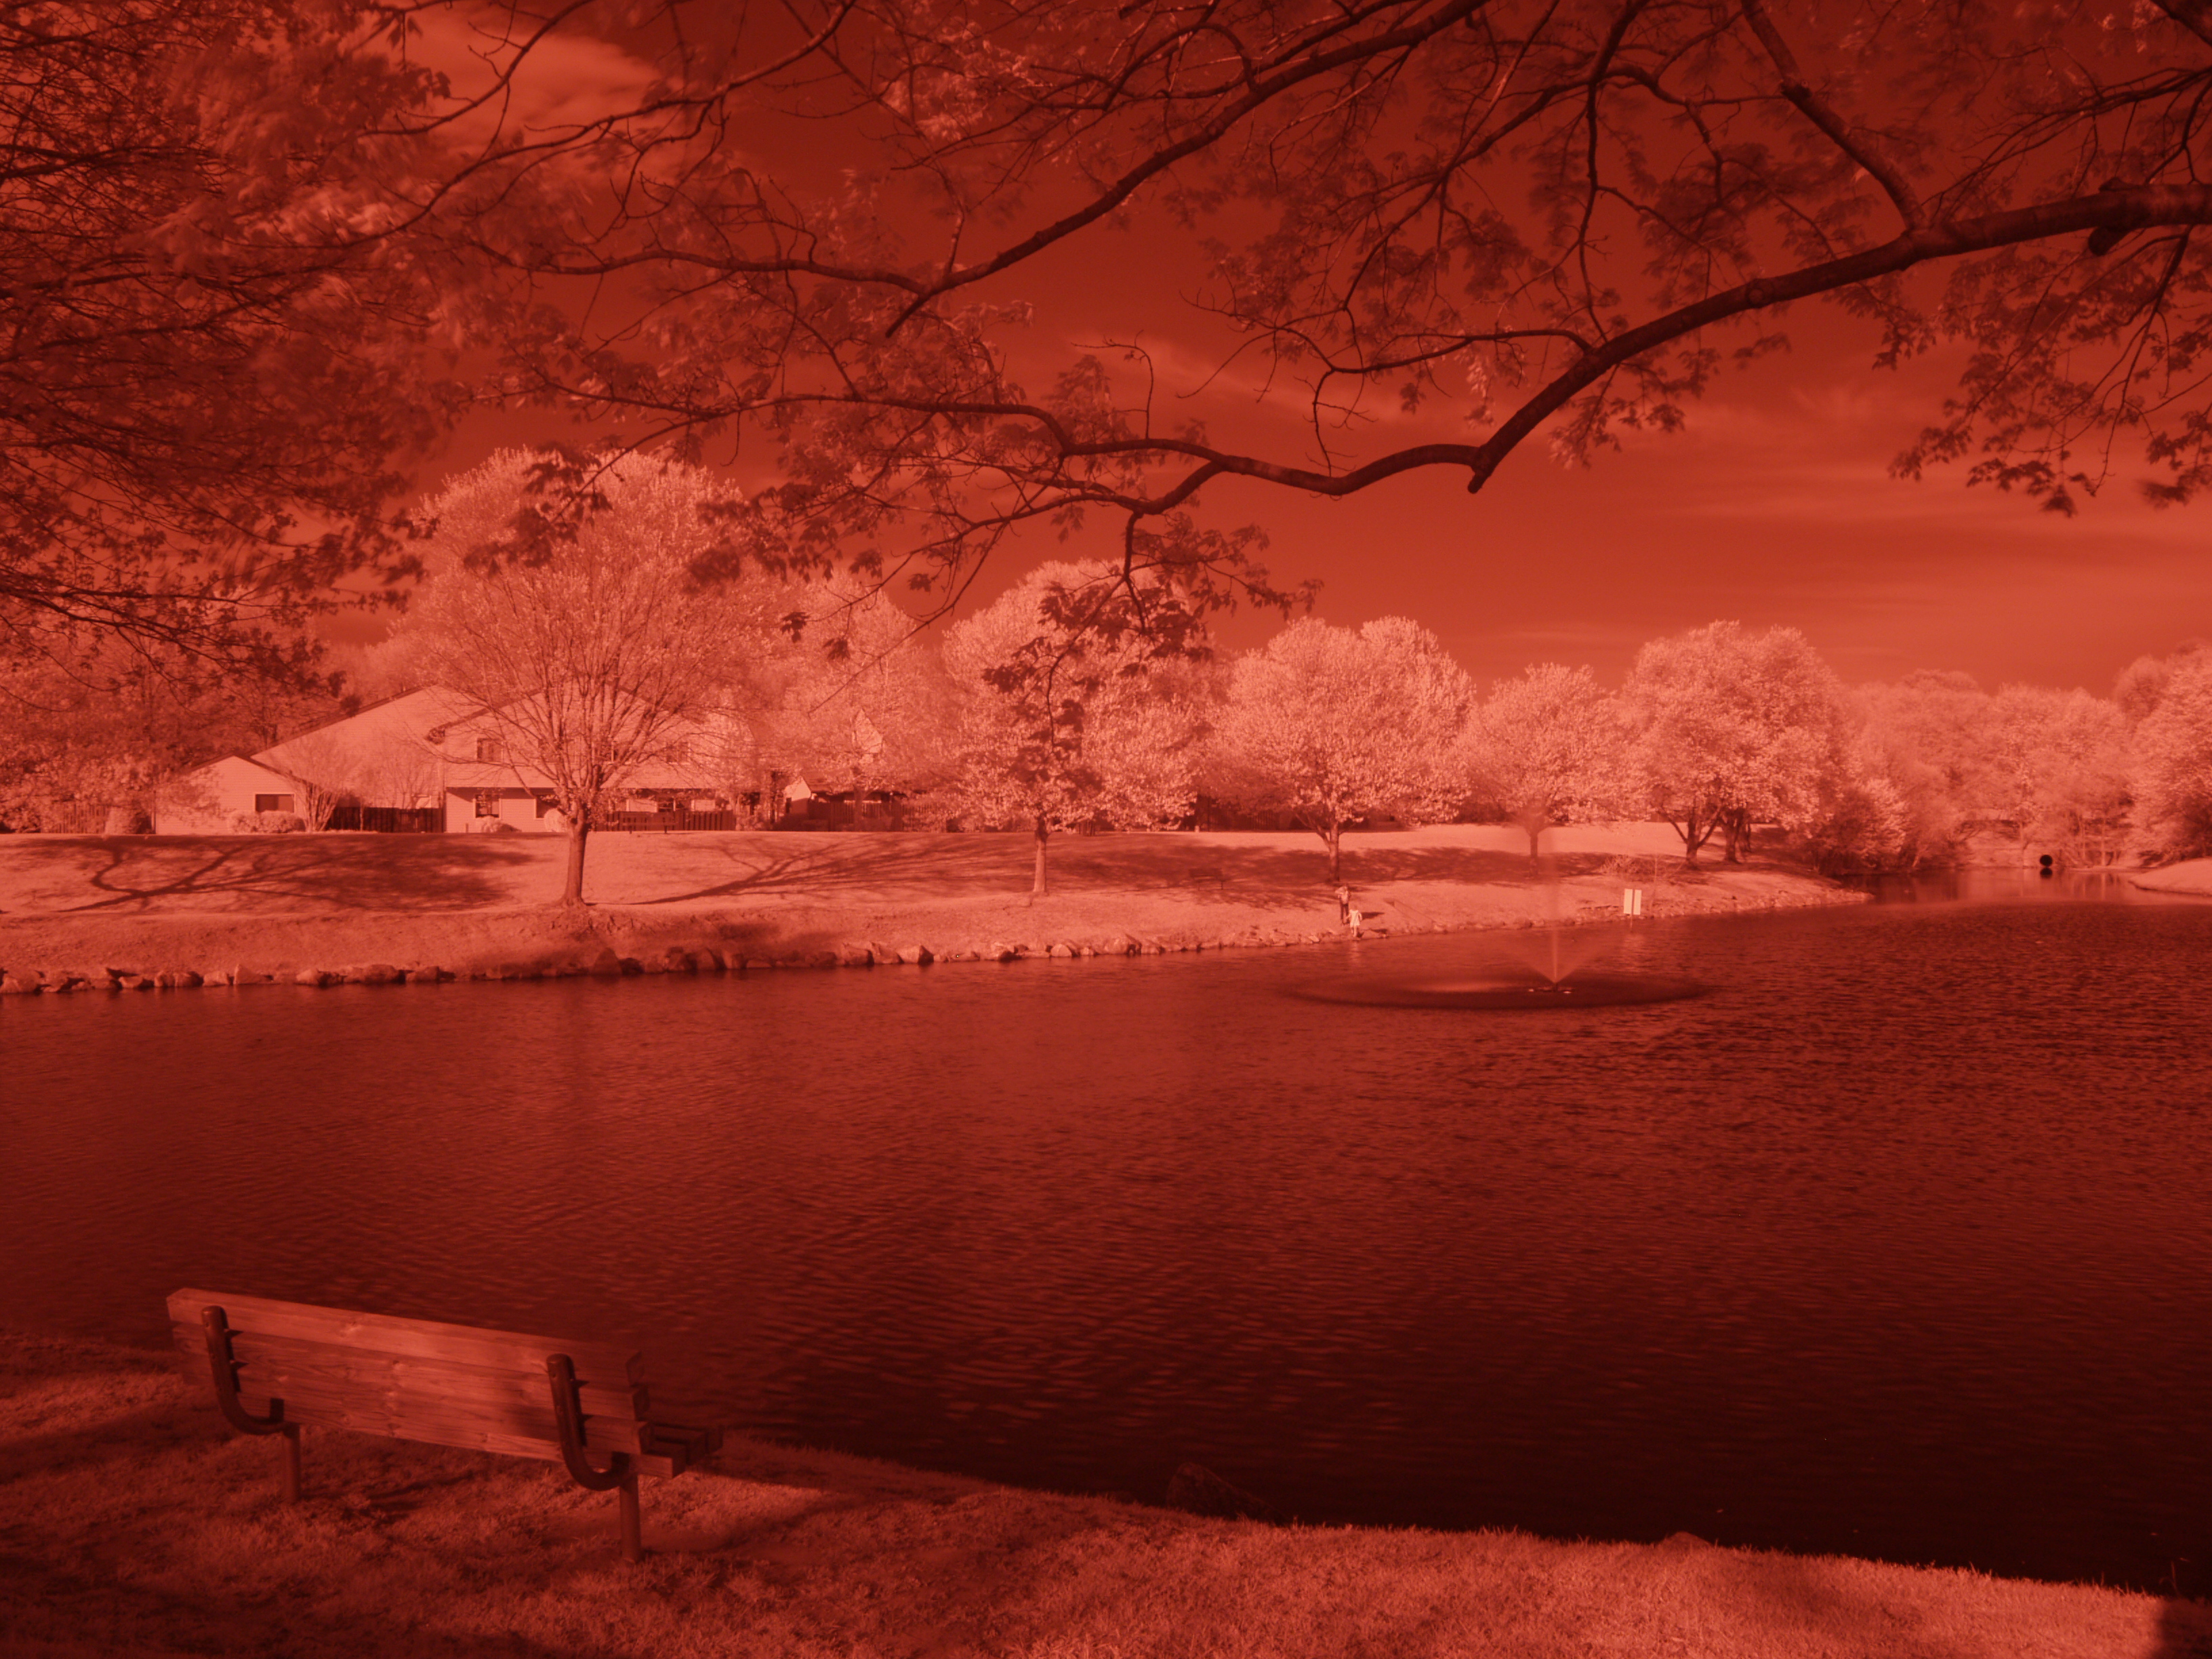
| [6] Hoya R72; aperture priority with +4 EV compensation: 2/3 s at F/8 and ISO 200, auto WB. | [7] Image [6] after 90% desaturation in Corel Photo-Paint | |
.t.jpg)
|
.t.jpg)
| |
| [8] Hoya R72; aperture priority with + 4EV compensation: 3/4 s at F/8 and ISO 200, WB at 3000K (tungsten). | [9] Image [8] after 90% desaturation in Corel Photo-Paint | |
|
The small difference in autoexposure between both IR pictures may be due to different color balance settings, or it may be a random effect — I am not quite sure; it is insignificant anyway. The calculated exposure compensation factor is 156 and 192 times, respectively, for [6] and [8]; consistent with my findings from the previous session. Note that the general tint of the image [8], shot at tungsten white balance, is purplish, i.e., shifted towards the blue — as expected when the color temperature setting was moved down (as the camera compensates for red, expecting ambient color temperature to be lower). The tonality of both pictures is similar; my general impression that tungsten WB results in slightly stronger Woods effect (white tree leaves) may be just a random effect, although other pictures from that session seem to support this. The slight hue difference in almost-desaturated images is the remnant of the stronger one in original ones, as expected. The bottom line: it seems that the color balance setting does not matter in IR shooting, as long as you plan to convert the images to monochrome. If you do not, use the one which pleases you more; remember, however, that if you switch to tungsten (300K), it is all too easy to forget about setting it back to auto (or daylight) after you remove the IR filter. Another filter: Tiffen #87 Being curious how my results will change when moving slightly deeper into infrared, I have acquired a Tiffen #87 IR filter. This one moves the spectrum cut-off about 40 nanometers higher, getting rid of the last traces of visible (red) light going through the R-72. On the negative side: Tiffen has to be credited with inventing the ugliest, largest, and least practical system of filter boxes, larger than some compact cameras, difficult to open, and deserving only to end up in your trash as soon as you take the filter out and find some other container. This is a part of a more general trend, with filter makers concerned only with the convenience of hanging filters on display racks, not of storing them in your camera bag. True, the Hoya boxes are also impractical and ugly, but Tiffen is even worse. I end up buying B+W filter boxes at $6 apiece, as the maker's ones are just useless. Here is the same scene as the one shown in [5], this time shot with the #87 filter, within two minutes from [6] and [8]. | ||
.t.jpg)
|
.t.jpg)
| |
| [10] Tiffen #87; manual exposure of 4 seconds at F/8 and ISO 200, WB at 3000K (tungsten). | [11] Image [10] after 90% desaturation in Corel Photo-Paint | |
|
As expected, the #87 filter requires longer exposures: an IR-to-visible factor of 1000x, or 10 EV (probably more, as I could use some more exposure here). Because it cuts off the far red, the image shifts further into blue. The sky, as expected, is somewhat darker, but not dramatically so, and the Woods effect does not seem to gain any strength. A closer inspection reveals that the shadows are less deep; the image has a bit less contrast. My first impression is that, with the E-300 at least, the #87 filter is rather a waste of money. You lose 3 EV (a factor of 8) in exposure, without noticeable differences in IR effects. I think I will stick to the R72 which also is less expensive. (Again, let me stress: for other digital cameras things may look different. Don't ask me: if I ever use the #87 with another camera, the results will be posted in my IR section.) Other remarks The images, especially those with the R72 filter, turned out better than I expected. My IR photographs from other Olympus cameras used to be quite noisy (what I didn't mind), but here the noise turned out to be well under control at ISO 200, and this in spite of higher CCD resolution. I think I will use ISO 400 in my future experiments. Stay tuned. The tonality is also good, with more highlight/shadow detail than I was getting from other models, as far as I can see. All this may make me reconsider the decision of not using the E-300 for infrared work and depending on a non-SLR model: the inconvenience of not having a live, electronic preview may be offset by the results.
Check also The Beauty of Infrared page in my Gallery section. | ||
|
|
|
Back to the Olympus E-System...
...or to Infrared Photography |
| Home: wrotniak.net | Search this site | Change font size |
| Posted 2005/04/27; last updated 2007/04/16 | Copyright © 2004-2007 by J. Andrzej Wrotniak |